CV PowerPoint Generation
Your template will consist of several fields and sections where placeholder content will be replaced by the real content of the consultant to use the CV. Those fields and sections need to be identified and replaced by the actual content you are able to edit in decídalo.
Contrary to the title, it is indeed possible to have multiple slides in the PPTX file. There are no restrictions on the placeholders you can use on the slides.
Adding Fields to a CV Template
Each section is enclosed by "<<" and ">>" and only contains the field name, e.g. “CandidateName”, the identifier of the data field to enter at this point.
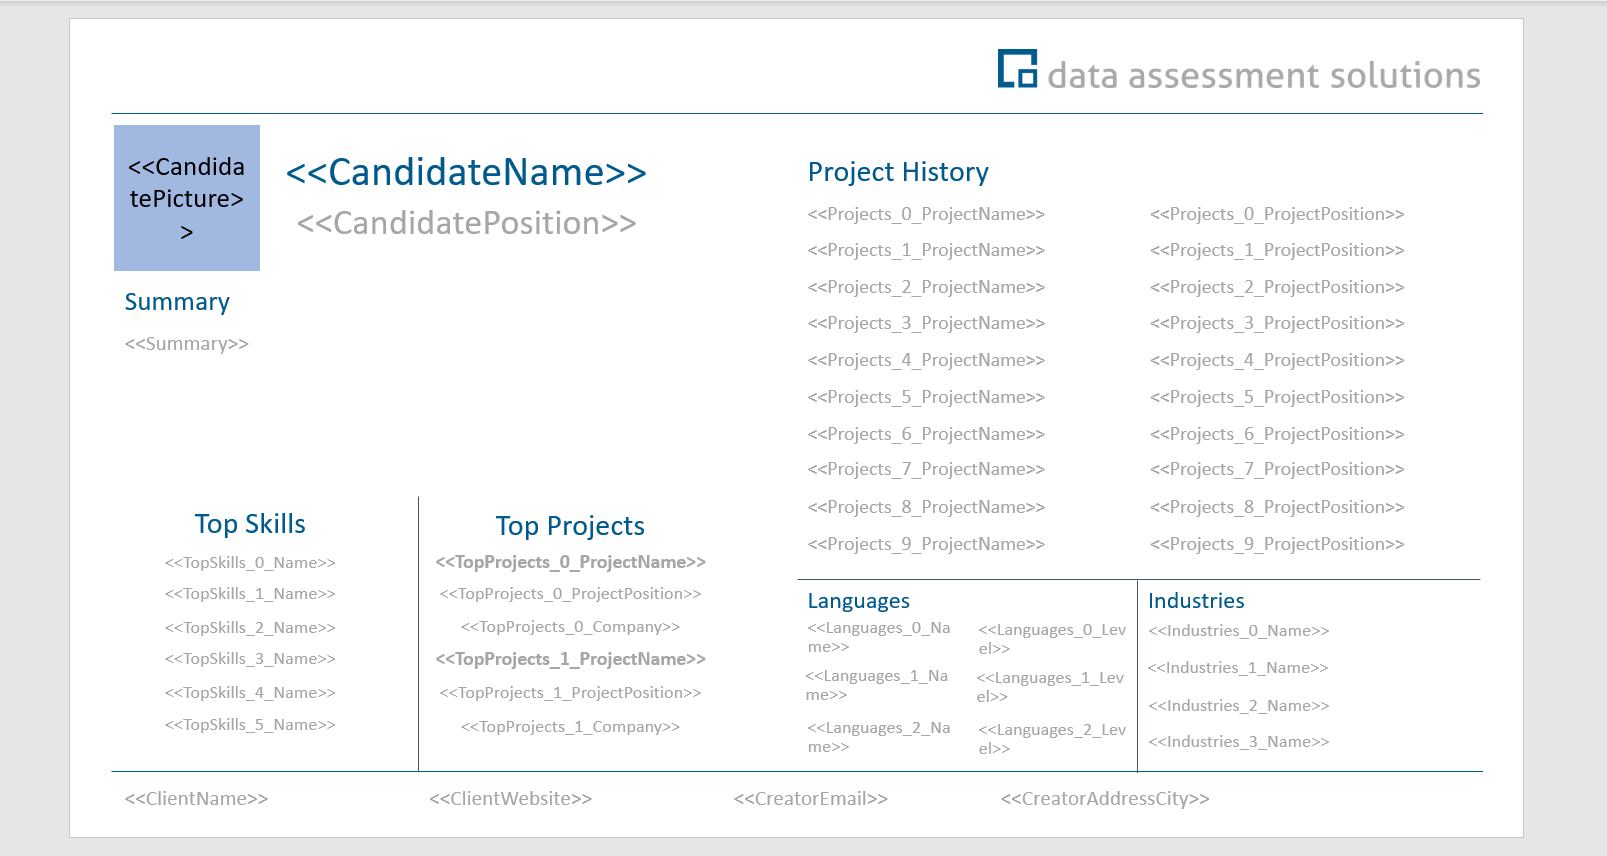
As you can see, there are a few exceptions regarding the syntax, we will look at them in detail now.
Regarding the position,there are basically no restrictions on where you add sections on your template.
The Different Fields
Every data field that can be displayed on the CV is represented by a field name. Some data fields are of a nested nature like e.g., a collection of projects: Your CV usually includes a list of several projects that all have re-occurring fields like the project name or the duration of the project. Nested fields are organized in lists.
The following table shows all the fields currently available.
| Field | Description |
|---|---|
| CandidateName | The name of the candidate the CV is created for. |
| CandidatePosition | The position of the candidate. |
| HighestEducation | The highest education of the candidate. |
| YearOfBirth | The year when the candidate was born. |
| Nationality | The nationality of the candidate. |
| Summary | A text summary on the CV. |
| CreatorEmail | The email of the person who created the CV (for contact information). |
| CreatorAddressCity | The location of the person who created the CV (for contact information). |
| CreatorName | The name of the person who created the CV. |
| CreatorPosition | The position of the person who created the CV. |
| CreatorMobilePhoneNumber | The mobile phone number of the person who created the CV. |
| CreatorOfficePhoneNumber | The office phone number of the person who created the CV. |
| CareerLevel | The career level of the candidate. |
| DeliveryModel | The engagement location model for service delivery (onshore, nearshore, offshore). |
| BusinessUnit | The organizational division the employee belongs to (e.g., Sales, Consulting). |
| PracticeArea | The specific area of expertise or focus within the organization (e.g., Project Management, IT Security). |
| EmployeeType | The type of employment for the user within the organization (e.g., Internal, External). |
| CostCenter | The organizational unit or budget code that the employee’s costs are charged to (e.g., marketing, R&D, operations). |
| LegalEntity | The registered company or legal entity the employee belongs to (e.g., Main Company). |
| ServiceLine | The specific line of service provided by the employee within the organization (e.g., Consulting, IT Services, Marketing & Advertising). |
| Team | The specific team the employee is assigned to within the organization. |
| TeamManager | The manager of the team the employee belongs to. |
| EntryDate | The date when the employee joined the organization. |
| ExitDate | The date when the employee left or is planned to leave the organization. |
| WeeklyWorkingHours | The total number of hours the employee is expected to work per week (e.g., 40). |
| EmployeeID | A unique identifier for the employee, typically used across systems (e.g., external user ID). |
| HolidayCalendar | The calendar that defines the employee’s official holidays and non-working days, as it applies on the day the CV is created. |
| Country | The country where the employee is based or originates from. |
| SkillSections (List) | The section where all skills, organized in sub-sections, are listed. |
| • Name | The name of the skill section. |
| • Skills (List) | A sub-section for a single skill topic. |
| ◦ Name | The skill name. |
| SkillsByCategory (Category Dictionary) | Skills grouped by skill category name (translated to the CV language). Use this to display skills of a specific category. Spaces in the category name are removed. See Filtering Skills by Category. |
| • {CategoryName} (List) | Skills for the named category, where {CategoryName} is the translated category name with all spaces removed (e.g. Technologien or SoftwareDevelopment). Only standard (category-backed) skill sections are included. |
| ◦ Name | The skill name. |
| TopCertificates (List) | Certificates that are particularly relevant for this CV. |
| • Name | The certificate name. |
| Certificates (List) | The section where all certificates are listed. |
| • Name | The certificate name. |
| TopProjects (List) | Projects that are particularly relevant for this CV. |
| • ProjectName | The name of a single project. |
| • ProjectPosition | The candidate’s position in the project. |
| • ProjectDescription | A description of the project. |
| • PersonalProjectDescription | The candidate’s own description of the project. Hidden by default; enable it under Administration > Entity Customization. No central fallback. |
| • Contribution | A text describing the candidate’s contribution to the project. |
| • Duration | The duration of the project. |
| • StartDate | The start date of the project. |
| • EndDate | The end date of the project. |
| • Company | The name of the company the project is associated with. If the customer data is hidden on the project, see Project Anonymization for the value used. |
| • CompanyIndustry | The industry the project is associated with. |
| • CompanyRegisteredName | The officially registered name of the company the project is associated with. |
| • CompanyAlias | An alias of the company the project is associated with. May be used for anonymization purposes. |
| • ProjectLocation | The location where the project was carried out (city / country / site). Sourced from the Location field on the project reference. |
| • Skills (List) | The skills used in this project. |
| ◦ Name | The skill name. |
| Projects (List) | The section where the project history is shown. |
| • ProjectName | The name of a single project. |
| • ProjectPosition | The candidate’s position in the project. |
| • ProjectDescription | A description of the project. |
| • PersonalProjectDescription | The candidate’s own description of the project. Hidden by default; enable it under Administration > Entity Customization. No central fallback. |
| • Contribution | A text describing the candidate’s contribution to the project. |
| • Duration | The duration of the project. |
| • StartDate | The start date of the project. |
| • EndDate | The end date of the project. |
| • Company | The name of the company the project is associated with. If the customer data is hidden on the project, see Project Anonymization for the value used. |
| • CompanyIndustry | The industry the project is associated with. |
| • CompanyRegisteredName | The officially registered name of the company the project is associated with. |
| • CompanyAlias | An alias of the company the project is associated with. May be used for anonymization purposes. |
| • ProjectLocation | The location where the project was carried out (city / country / site). Sourced from the Location field on the project reference. |
| • Skills (List) | The skills used in this project. |
| ◦ Name | The skill name. |
| Languages (List) | The section where the languages are listed. |
| • Name | The language name. |
| • LevelDescription | A textual level describing the candidate’s fluency in the language. |
| Industries (List) | The section where the industry experience of the client is listed. |
| • Name | The name of an industry. |
| TopSkills (List) | A section to display selected top skills. |
| • Name | The name of the skill. |
| ProfessionalExperience (List) | The section where the candidate’s professional career is shown. |
| • Company | The company of a single entry in the candidate’s career. |
| • JobTitle | The position taken in that company. |
| • Description | A description of the role in the company. |
| • Duration | The duration of the employment. |
| • StartDate | The start date of the employment. |
| • EndDate | The end date of the employment. |
| Trainings (List) | The section where the candidate’s training history is shown. |
| • Company | The provider of a single training in the candidate’s training history. |
| • TrainingName | The name of the training. |
| • TrainingDescription | A description of the training. |
| • Duration | The duration of the training. |
| • StartDate | The start date of the training. |
| • EndDate | The end date of the training. |
Images
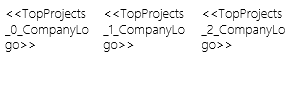
Similarly, images can be added for candidate core data and supported list items such as projects and top projects (see Working with Lists). Placeholder text needs to be a part of a shape object and the image will have the position and dimensions of the shape object. The following are the possible images to insert:
| Identifier | Description |
|---|---|
| CandidatePicture | The profile image of the candidate. |
| Projects (List) | |
| CompanyLogo | The image of the company logo on the project history. |
| Top Projects (List) | |
| CompanyLogo | The image of the company logo on the top project. |
Example of adding top project company logos:
Optional Parameters
Some fields allow to add optional parameters. The syntax for this is <<{FieldName}?{ParameterName}={Value}>>
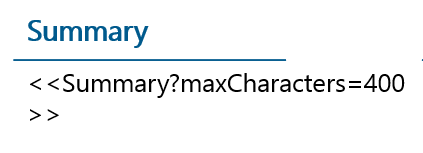
The following table shows all currently available parameters on the fields.
| Field | Parameter | Application | Description |
|---|---|---|---|
| All fields | textBefore | textBefore=[<string>] | Defines a string that will be displayed before the field. It is only displayed when the field has a value. |
| All fields | inlineTextBefore | inlineTextBefore=[<string>] | Like textBefore, but for formatted fields it is placed on the same line as the text instead of above it. See the notes below. |
| Summary | maxCharacters | maxCharacters=<number> | Defines the maximal length that the summary should have. This is used e.g. for ai-generated texts. |
| Projects_Duration, TopProjects_Duration, ProfessionalExperience_Duration, ProfessionalExperience_StartDate, ProfessionalExperience_EndDate, Trainings_Duration | dateFormat | dateFormat=<string> | Defines the format in which those dates will be displayed. |
| Projects_Company, TopProjects_Company | companyForAnonymizedProjects | companyForAnonymizedProjects=<string> | Defines the value that should be displayed on the generated CV instead of the company name if the 'Display customer data on CV' for a project is set to 'No' |
| Projects_ProjectName, TopProjects_ProjectName | projectNameForAnonymizedProjects | projectNameForAnonymizedProjects=<string> | Defines the value that should be displayed on the generated CV instead of the project name if the 'Display customer data on CV' for a project is set to 'No' |
Labels in front of formatted fields
Fields that are edited in a formatted text editor, such as a project description or a paragraph custom field, can consist of several paragraphs. Their content is therefore placed in paragraphs of its own on the slide, and a label added with textBefore appears on the line above the text.
If you want the label on the same line as the beginning of the text, use inlineTextBefore instead:
<<Projects_0_ProjectDescription?inlineTextBefore=[Project description: ]>>
Both options display the label only when the field has a value, so an empty field leaves no stray label behind. They differ only in where the label is placed, and textBefore keeps working exactly as before, so existing templates are unaffected. If you set both on the same field, inlineTextBefore is used.
Three things to keep in mind when using inlineTextBefore:
- The label always takes over the formatting of the field it belongs to. It cannot be made bold or coloured on its own. If you need a differently formatted label, write it into the template as normal text instead, on the line above the field.
- If the field content starts with a list or a table, the label is placed on the line above the content, because it cannot become part of a list entry.
- On a field that is not a formatted text field, for example a date or a name, both options behave identically.
The value may contain letters, digits, spaces and the characters = [ ] , : - & . /. Other characters, for example brackets or a semicolon, are not supported and cause the placeholder to be printed as it is.
Working with Lists
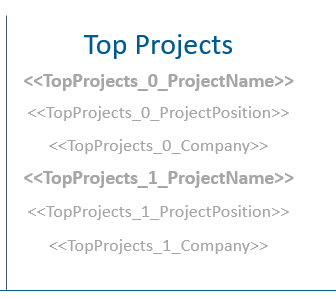
When working with CV information organized in lists, positions need to be used to define their occurrence.
To display a list, you first give the name of list, e.g. “Projects”, then an underscore, then the position number and finally the fieldname, e.g. “Projectname”. The following picture shows how this could be done for a project section.
Note that at the moment, it is not be recommended to use SkillSections, e.g. <<Skillsections_0_Skills_0_Name>>, since the SkillSections are not ordered and cannot be reordered so far.
Customizing the Date Format
Using the optional dateFormat parameter, you can customize how these date fields are formatted during CV generation, including start and end dates, duration, and publication date. This allows you to control the appearance of the date format according to your preferences.
For example, you might want to display dates in the format yyyy (year) or MM-yyyy (month-year), depending on the context.

You only need to specify the date format on one appearance of a specific list (Trainings, Projects, TopProjects, ProfessionalExperience or Publications) and that format will be applied on all items on the CV in that list.
Note: The date format for the Duration of Projects and TopProjects must be uniform. If for both lists a different format is provided in the template the one from the Projects will be applied on both. If there is no format specified for Projects but there is one for TopProjects, that format will be applied on both.
Customizing the bullet type in rich text editor fields
The bullet type which will be used in rich text editor fields can be customized by specifying it anywhere in the template in its own new line like this(in this example it is located below the summary):

Currently supported types are dash, circle and square.
Once you specify the bullet type in the template it will be used for unordered lists of all rich text editor fields. If no type is specified in the template the default that is used is the circle.
Project Anonymization
It is possible to specify for each project individually in the application if the customer data should be displayed. If you do not wish to display the customer's name on generated CVs where the Company merge field is used, set the 'Display customer data on CV' option to 'No' on the project. The 'Display customer data on CV' option is set only in the application on project level and is not specified in the templates.
In addition to the project-level setting, each customer (company) in the application has a flag called 'Allow customer data export'. This flag controls whether any project linked to that customer is allowed to export customer-related data (such as company name and logo) on CVs. If 'Allow customer data export' is set to 'No' for a customer, then all projects associated with that customer will be automatically treated as if 'Display customer data on CV' is set to 'No', regardless of the individual project setting. This ensures that customer data is anonymized for all such projects, following the same rules described below.
If the 'Display customer data on CV' option for a project is set to 'No', the system will anonymize the company information as follows:
- If a value is specified in the template with the companyForAnonymizedProjects word, that value will be displayed instead of the company name on the generated CV. More on the companyForAnonymizedProjects word can be found in the next section.
- If the template does not specify such a value but the company has an alias set, the alias will be used instead of the company name on the generated CV.
- If neither is set, nothing will be displayed in place of the Company merge field on the generated CV.
Company Customization For Anonymized Projects
It is also possible to define in individual CV templates a special custom value to be used instead of the company name on projects whose 'Display customer data on CV' is set to 'No'. In that case the company alias will not be used, but instead, the value defined in the template will be used. That is done via the companyForAnonymizedProjects word on the Company merge field in the Projects range. In the example in the screenshot below, the text "Secret company" will be displayed instead of the company name.
You only need to specify the value on one appearance of the projects or top projects list, and that value will be applied to all projects and top projects on the CV.

Note: The value specified via the companyForAnonymizedProjects for the Company of Projects and TopProjects must be uniform. If for both lists a different value is provided in the template the one from the Projects will be applied on both. If there is no value specified for Projects but there is one for TopProjects, that value will be applied on both. If there is no value specified for TopProjects but there is one for Projects, that value will be applied on both.
Project Name Customization For Anonymized Projects
It is also possible to define in individual CV templates a special custom value to be used instead of the project name on projects whose 'Display customer data on CV' is set to 'No'. That is done via the projectNameForAnonymizedProjects word on the ProjectName merge field in the Projects range. In the example in the screenshot below, the text "Secret project" will be displayed instead of the project name.
You only need to specify the value on one appearance of the projects or top projects list, and that value will be applied to all projects and top projects on the CV. If the value is specified in multiple places, either on the projects or top projects, the first appearance will be taken and applied.

If the custom value is not specified in the template, the actual project name will always be displayed on the CV in place of the project's name.
Note: The value specified via the projectNameForAnonymizedProjects for the ProjectName of Projects and TopProjects must be uniform. If for both lists a different value is provided in the template the one from the Projects will be applied on both. If there is no value specified for Projects but there is one for TopProjects, that value will be applied on both. If there is no value specified for TopProjects but there is one for Projects, that value will be applied on both.
Custom Properties
Custom properties that have been added to any entity via the administration page, can be added to the templates as well.
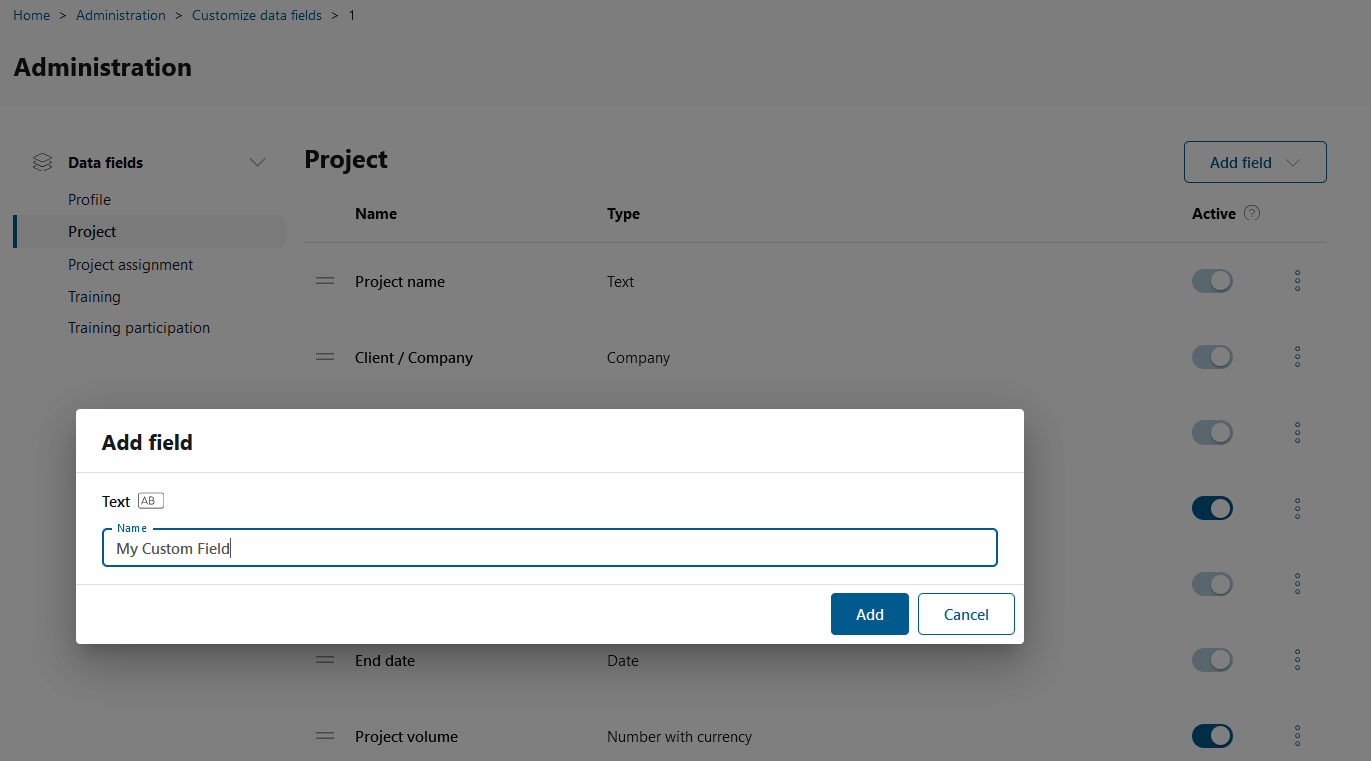
The corresponding placeholder starts with the entity list (see above). The field name itself then is "cp" followed by the given title in PascalCase. E.g. for a property "My Custom Field" on the project entity, the placeholder for the first project would be <<Projects_0_cpMyCustomField>>

In some special cases, in particular when properties with the same name have been added multiple times, the template placeholder must be extended by a small number e.g. <<cpMyCustomField1>>.
Filtering Skills by Category
The SkillsByCategory field allows you to display only the skills belonging to a specific skill category, rather than all skills at once. This is the equivalent of the v2 SkillsByTag functionality.
The category name is taken from the skill catalogue in the language of the CV template. Spaces are removed from the category name to form the placeholder key (do not replace them with underscores, because underscore is the path separator in merge fields and would cause ambiguous splits).
Example: to display the first 5 skills in the category "Technologien" (no space, unchanged):
<<SkillsByCategory_Technologien_0_Name>>
<<SkillsByCategory_Technologien_1_Name>>
<<SkillsByCategory_Technologien_2_Name>>
<<SkillsByCategory_Technologien_3_Name>>
<<SkillsByCategory_Technologien_4_Name>>
Example: for a multi-word category name such as "Software Development" (spaces removed, so "SoftwareDevelopment"):
<<SkillsByCategory_SoftwareDevelopment_0_Name>>
<<SkillsByCategory_SoftwareDevelopment_1_Name>>
Example: for "Technologien und Tools" → "TechnologienundTools":
<<SkillsByCategory_TechnologienundTools_0_Name>>
Important: The category name in the placeholder must exactly match the translated name of the category in the language of the CV template, with all spaces removed. A German template must use the German category name (without spaces), an English template must use the English category name (without spaces), etc.
Note: Only standard (category-backed) skill sections are available through
SkillsByCategory. Custom AI-mapped skill sections (configured per template) are not included. If the candidate has no skills in the requested category, the placeholder will render as empty.
Empty Fields and the Characters Around Them
A field with no value renders as nothing, and any characters typed directly against it, with no space between them, are removed together with it. This keeps an empty () off the slide when a consultant has not filled a field in.
| In the template | Field has a value | Field is empty |
|---|---|---|
English (<<Languages_0_Level>>) |
English (C1) |
English |
<<IssueMonth>>.<<IssueYear>> |
03.2024 |
2024 |
A character only counts as attached when no space separates it from the field, so ( <<Level>> ) keeps its brackets. Type them directly against the field. A neighbouring field also stops the removal, which is why an empty month leaves the year intact.
Be deliberate about labels: anything glued to the field goes with it. If a label should always appear, separate it from the field with a space.
For the same behaviour in Word templates, and for why the editable preview still shows the brackets, see CV Word Generation.
Template Upload
You can now finish the process of adjusting/creating with uploading the template. To read the documentation about it, go back to CV templates.