Managing & Using Roles
This article explains how roles are used and managed in decídalo. It outlines how to assign roles to employee profiles, create and edit roles and link the to skills or certificates.
Using roles on profiles
Each profile can have one or more roles assigned to it. Roles serve three main purposes: They provide an overview of an employee's areas of responsibility on profiles or CVs; they guide them through their skill assessment; they enable skill-gap analysis. The latter two require linking roles with skills.
Open your profile (or any profile you can edit) and scroll down to the "Roles" section. Here, you’ll see all roles assigned to the profile.
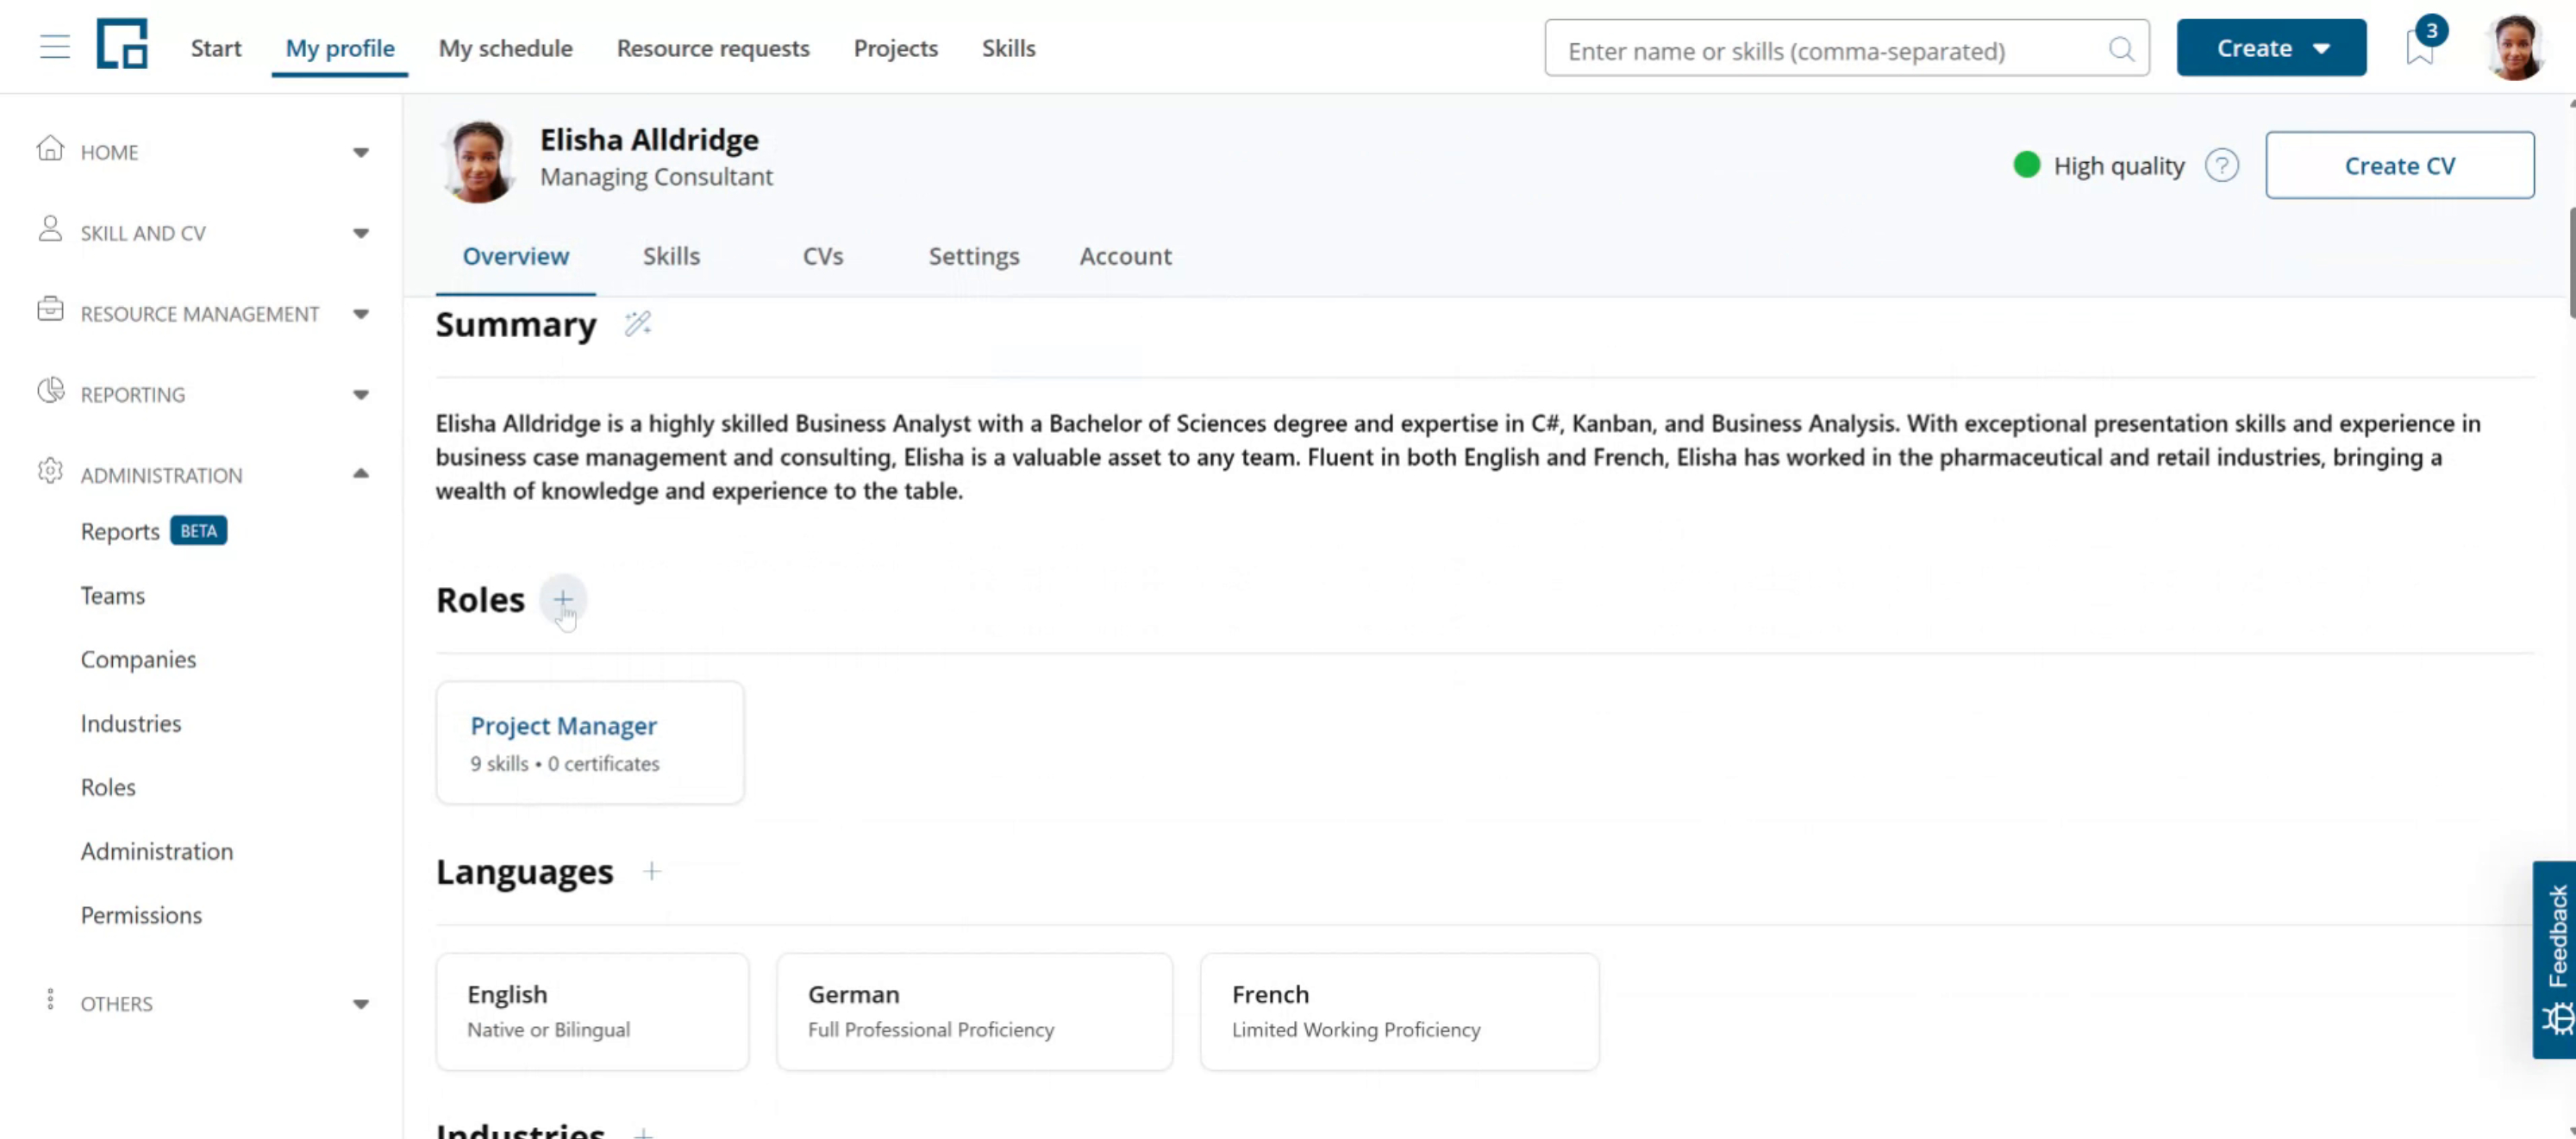
To assign a new role click the Plus icon next to the section header. From the auto-complete dropdown in the pop-up select the roles you want to include.
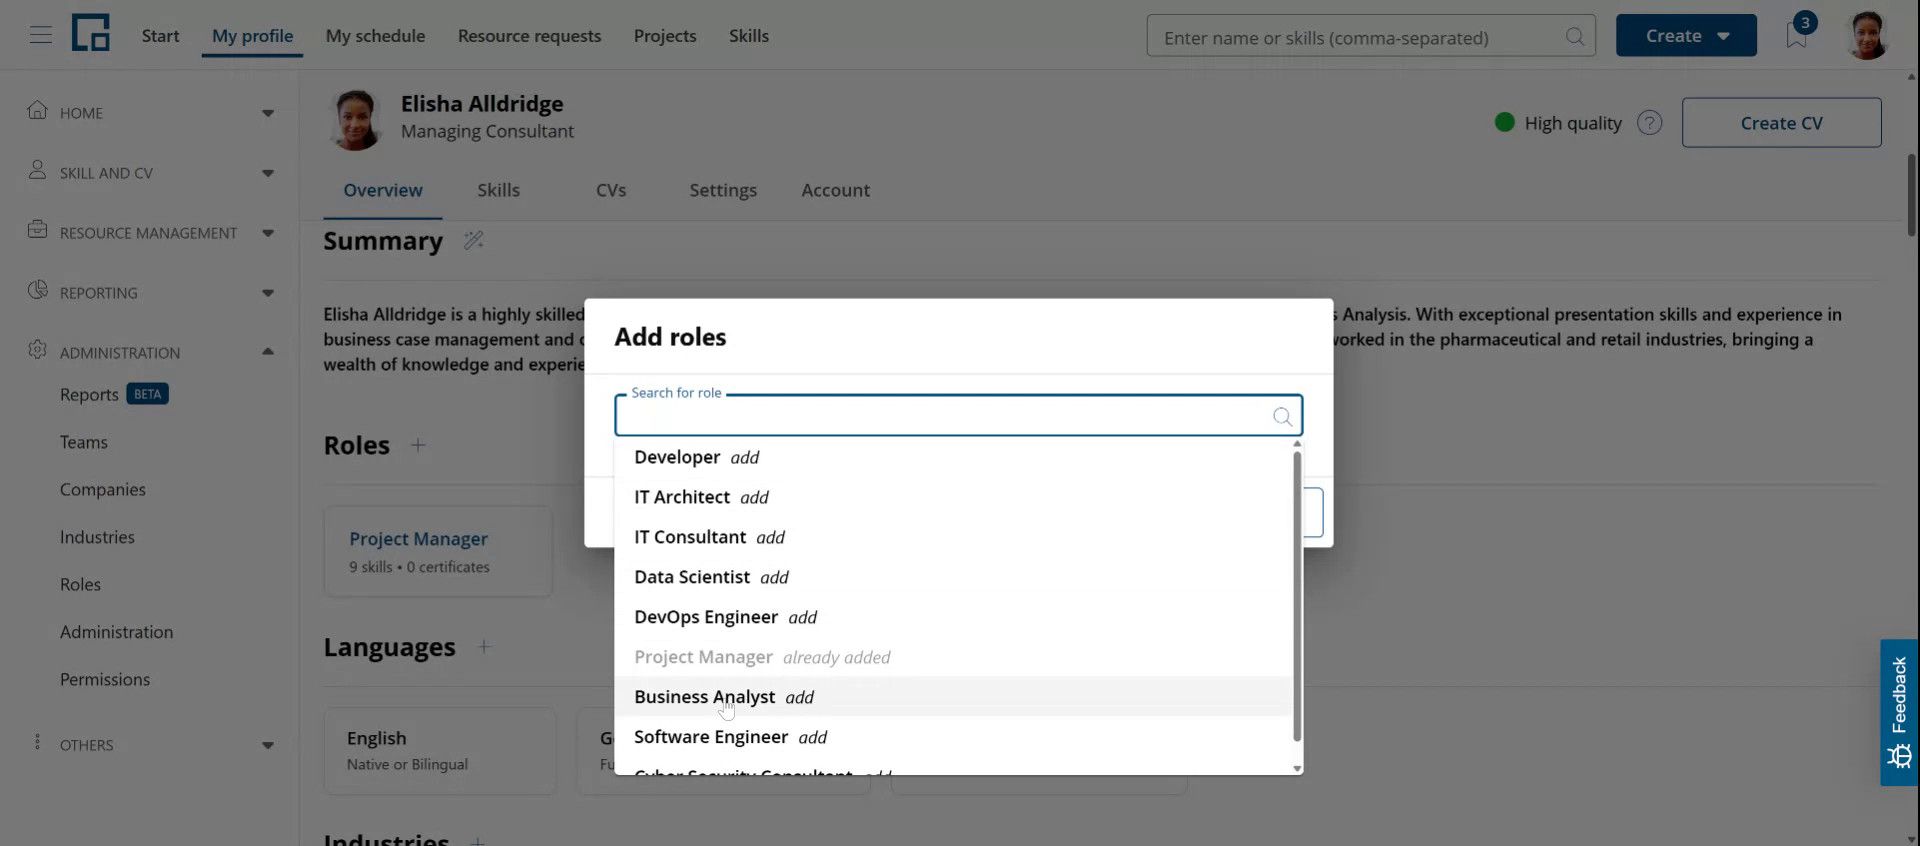 If you have the permission to manage the roles list in decídalo, you can create new roles here. To do this, type a name that is not in the list and select the "+ Add " option at the bottom of the list.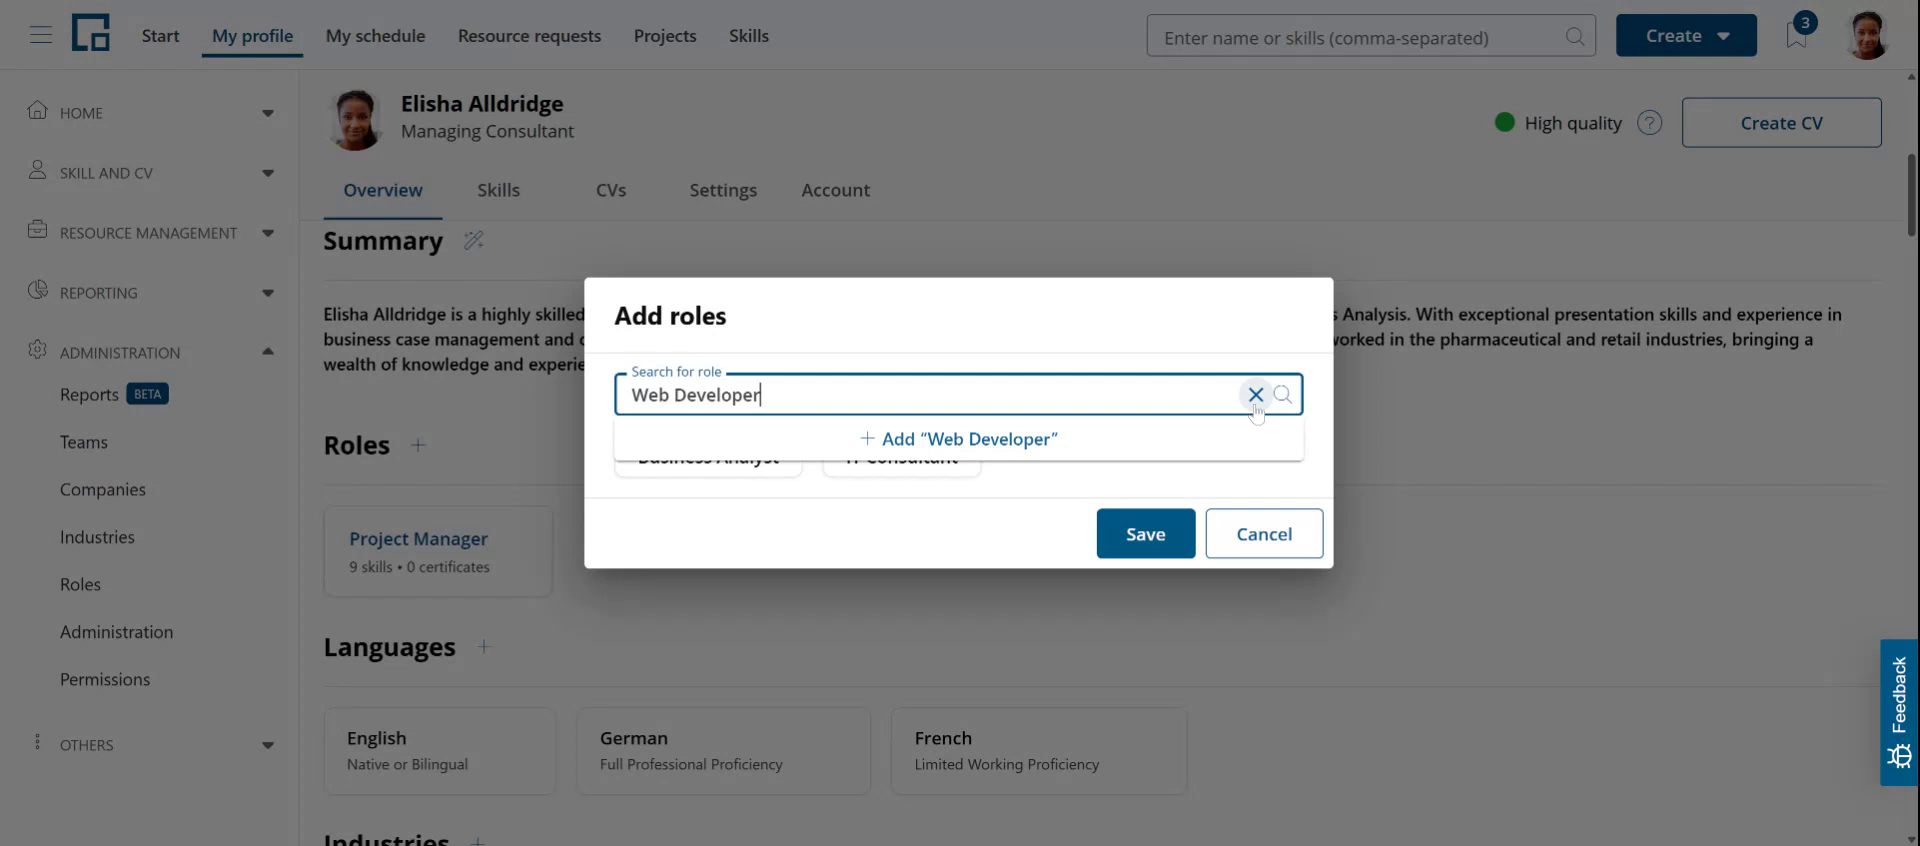
The Admin and customizations section of the Permissions page has two separate permissions for the skill, certificate and role catalogs. Adding a new role to the role list requires Manage skills, certificates and roles. Without it, only existing roles can be selected here. It is recommended to give normal users at most View skills, certificates and roles and to manage roles centrally.
Understanding role skill requirements
Roles can be connected to skills or certificates and thereby support users in filling out their skill profile. (This is the main reason why they should be managed centrally.) When you click on a role on a profile, a side drawer opens with its details.
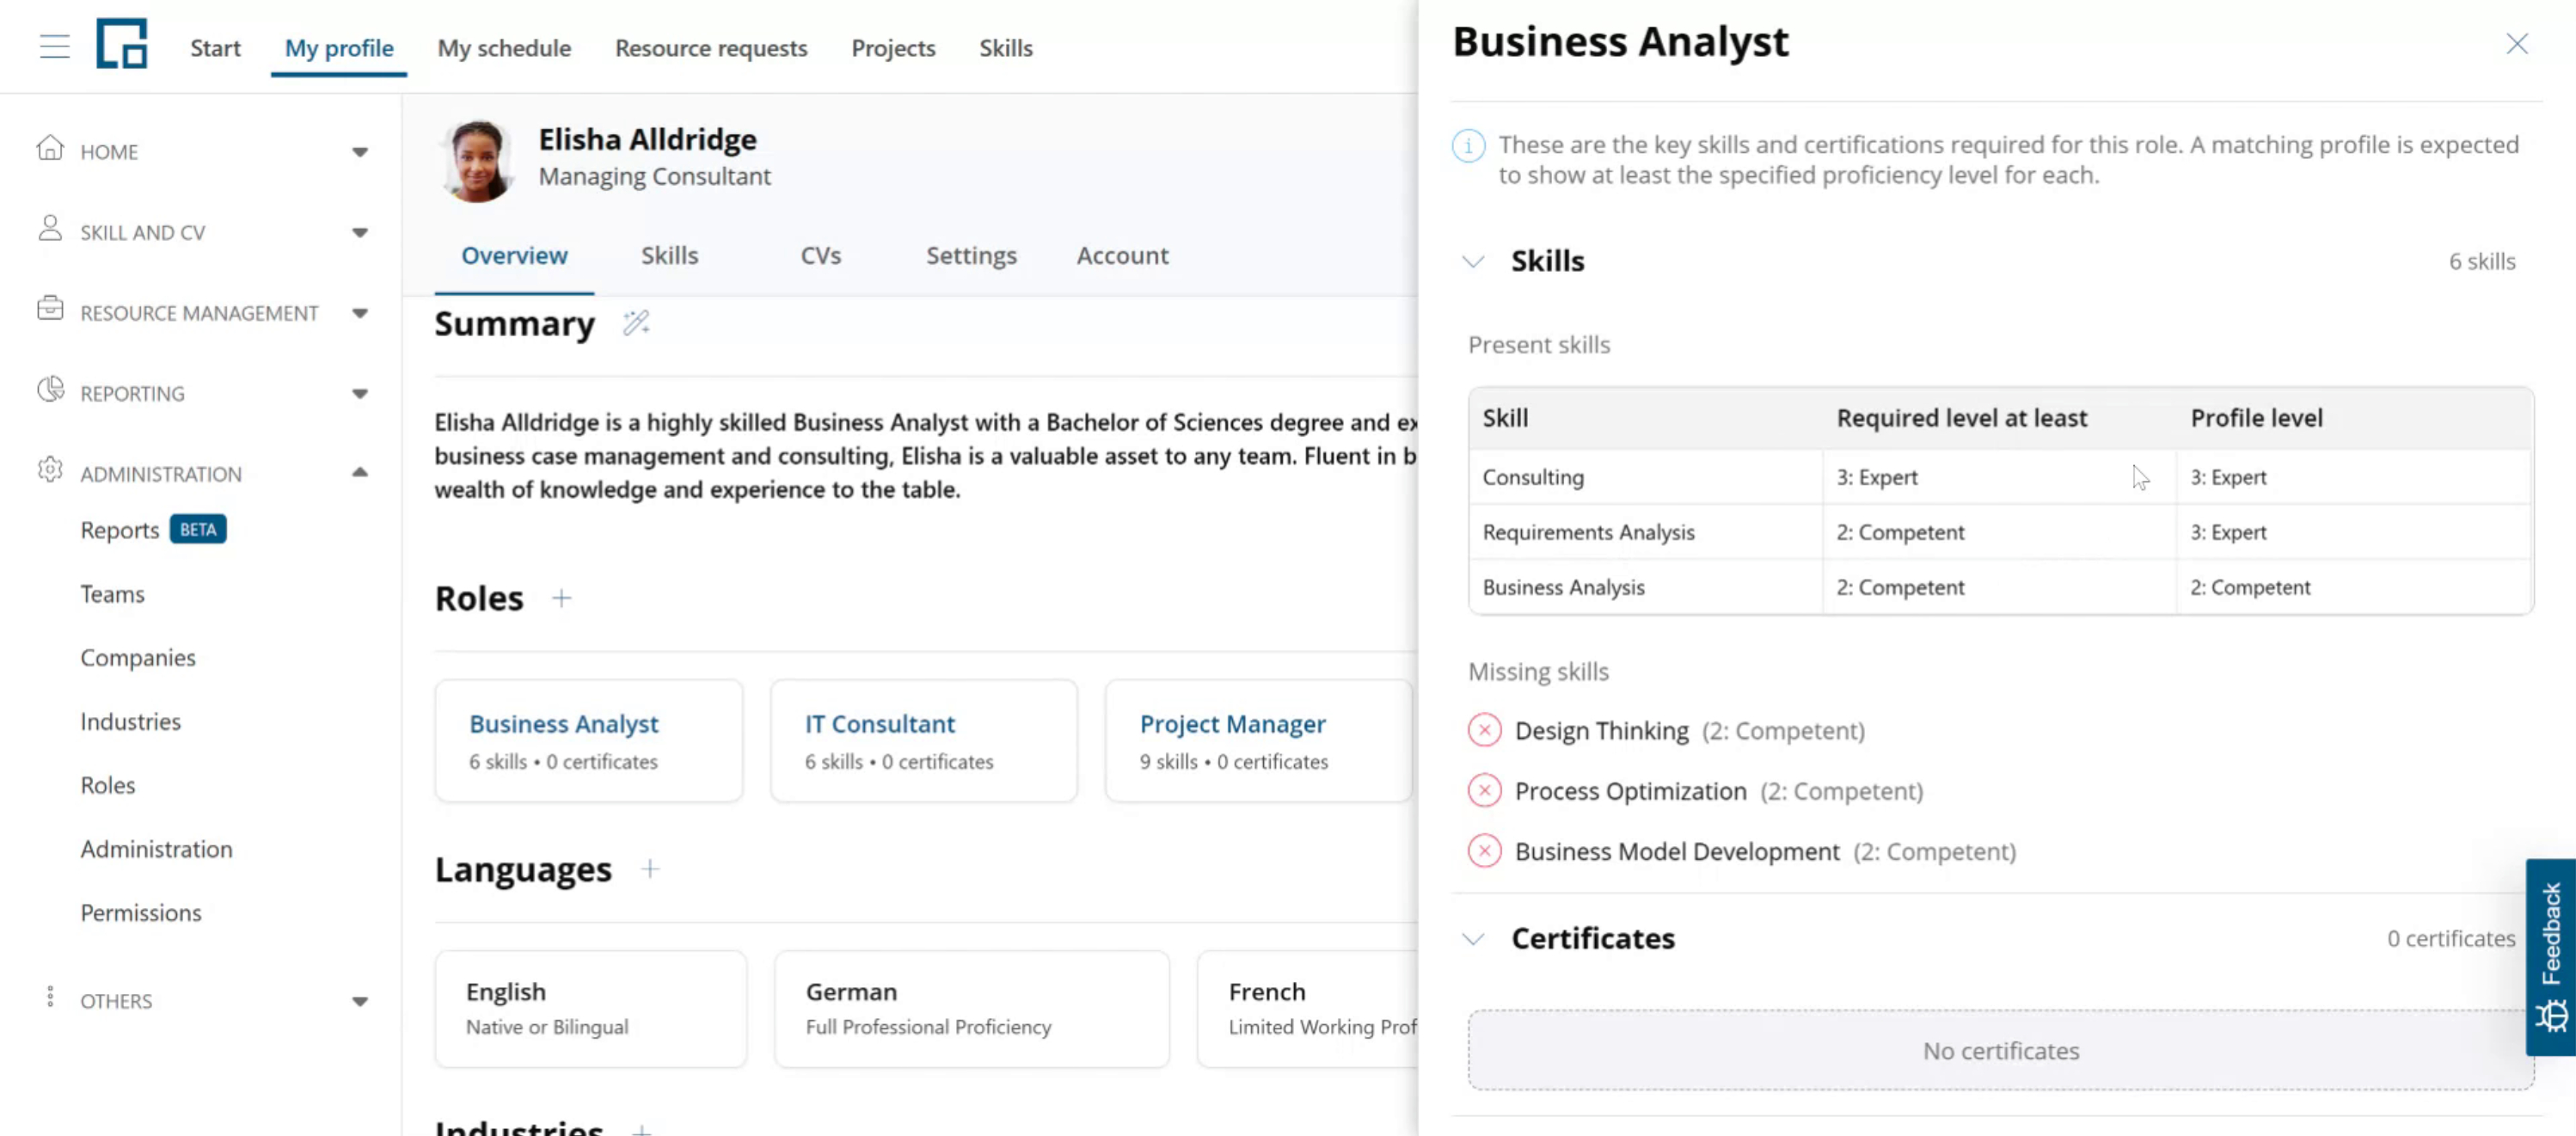
The Skills section lists every skill the role requires in a single table:
| Column | Description |
|---|---|
| Skill | The skill required for the role. |
| Required level at least | The minimum proficiency level the role expects. |
| Profile level | The level assessed on this profile. It shows Unknown level when the profile has the skill but no level was chosen, and Missing when the profile does not have the skill yet. The Role skill coverage report calls the first of these states ‘Unassessed’. |
A warning icon next to the profile level marks every skill where the requirement is not yet met: the skill is missing, or the assessed level is below the required one. Hover the icon for an explanation.
If you can edit the profile, set or change a level directly in the table: click a Profile level cell and choose a level from the dropdown. Choosing a level for a Missing skill adds it to the profile. The table, and the chart below it, update immediately.
Skill gap chart
Below the table, a radar chart shows the same comparison at a glance. Each axis is one of the role's skills; one shape represents the role's required levels and the other the profile levels, making it easy to spot the gaps where the profile sits inside the requirement.
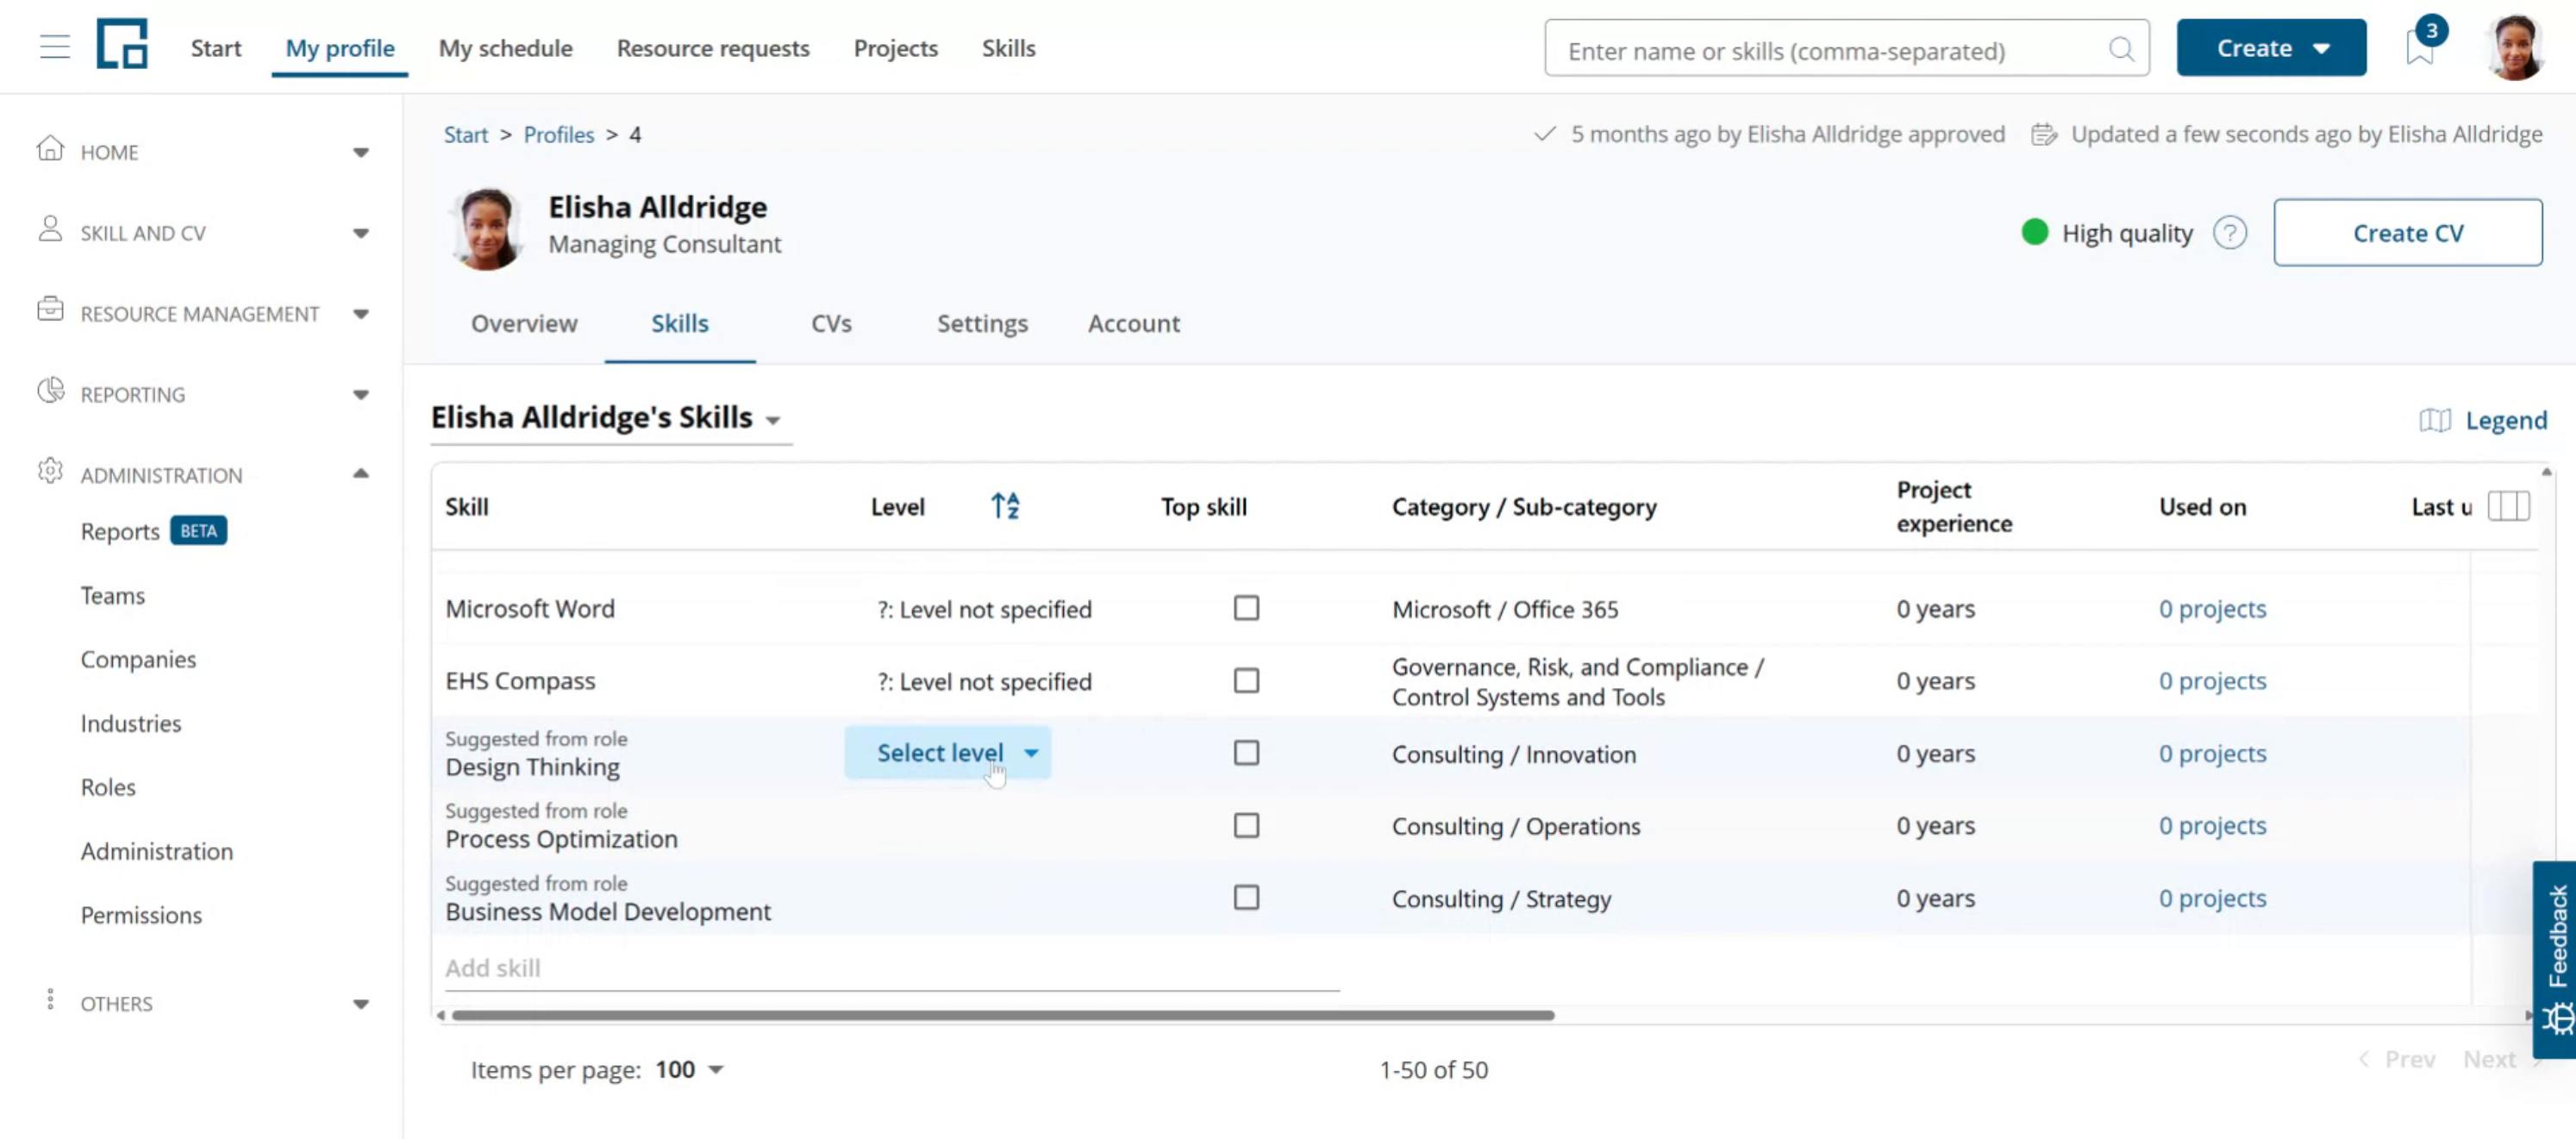
On the Skills tab, you'll also find any missing skills for your role suggested at the bottom, where you can quickly add them by setting a skill level.
Role skill coverage report
The same comparison is available for many profiles at once. On the ‘Profiles’ page, click Export and select Role skill coverage to download an Excel file with one row per profile, role and required skill, and one row per profile, role and required certificate.
The report respects the column filters and the sort order currently applied to the profiles table, so you can limit it to a team, a business unit or any other filtered set. For the meaning of the ‘Target Level’, ‘Actual Level’ and ‘In Possession’ columns, see Profile.
The same report is available for a single profile from the Report button on the ‘Skills’ tab of that profile.
Note: The Export menu is only available to users with the data export permission.
Managing roles
If you have the View skills, certificates and roles permission (see above), you see the Roles menu item under Administration and can browse, search and filter the table. Editing, creating and deleting roles additionally requires Manage skills, certificates and roles. The screenshots below show the view of a user with both permissions.
Here, you’ll see a table of all roles. With the Manage permission, you can edit them using inline-editing by clicking the cell you want to change.
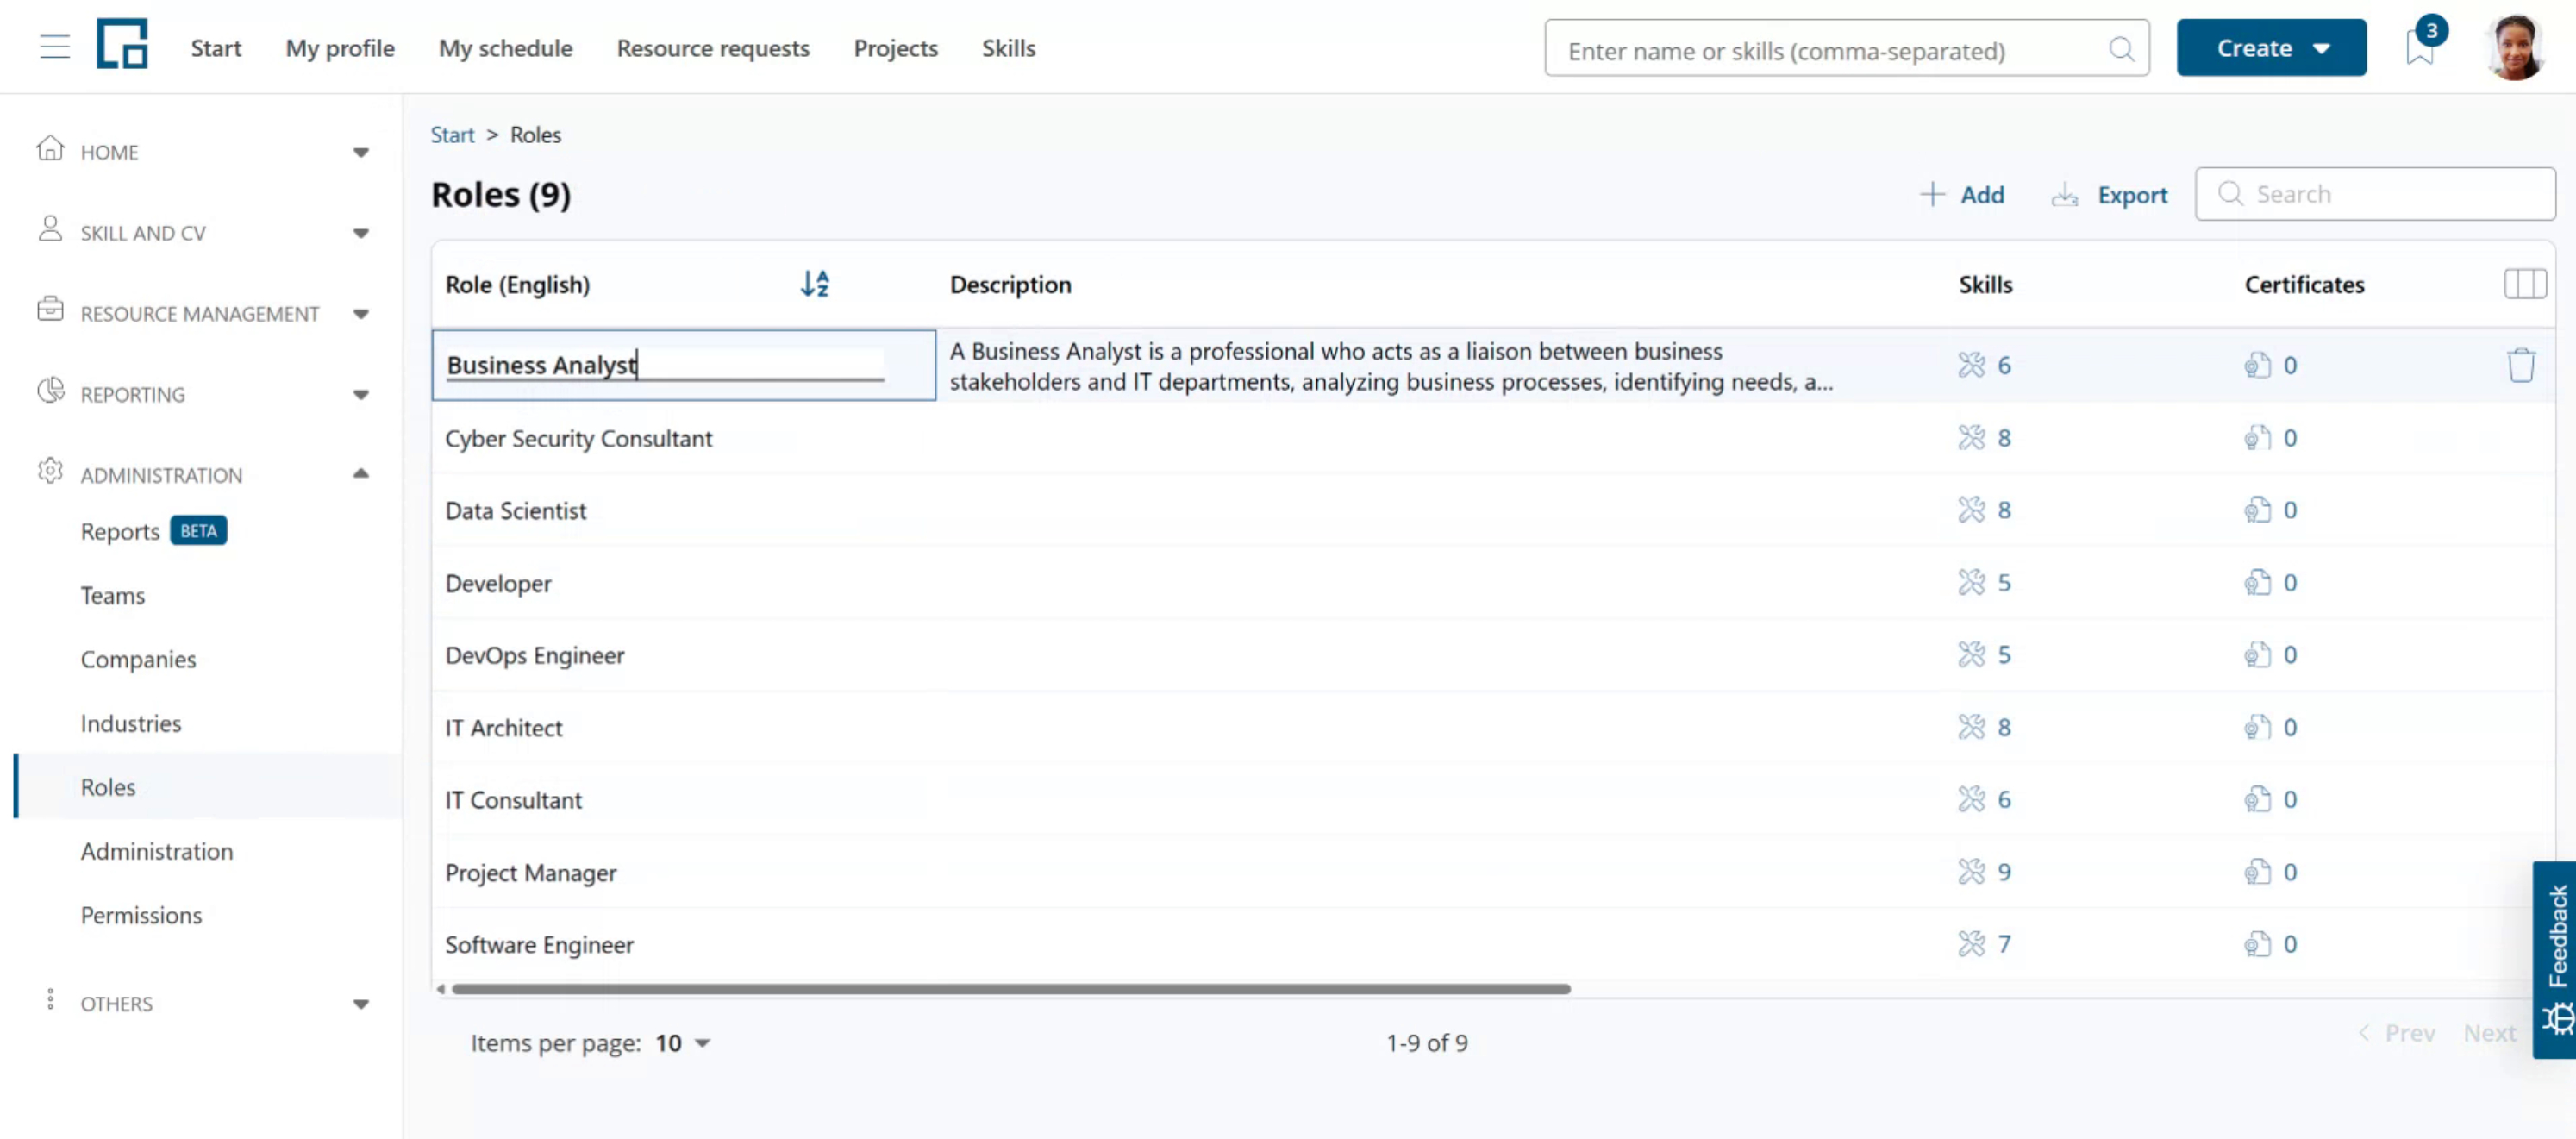 The skills, certificates, and profiles columns show the number of corresponding elements linked to the role. Click on any of these numbers to open a side drawer that lists the elements. With the Manage permission, you can add or remove linked skills and certificates and change required skill levels; without it, the lists cannot be changed. In the profiles list, people you are not permitted to view are shown anonymized.
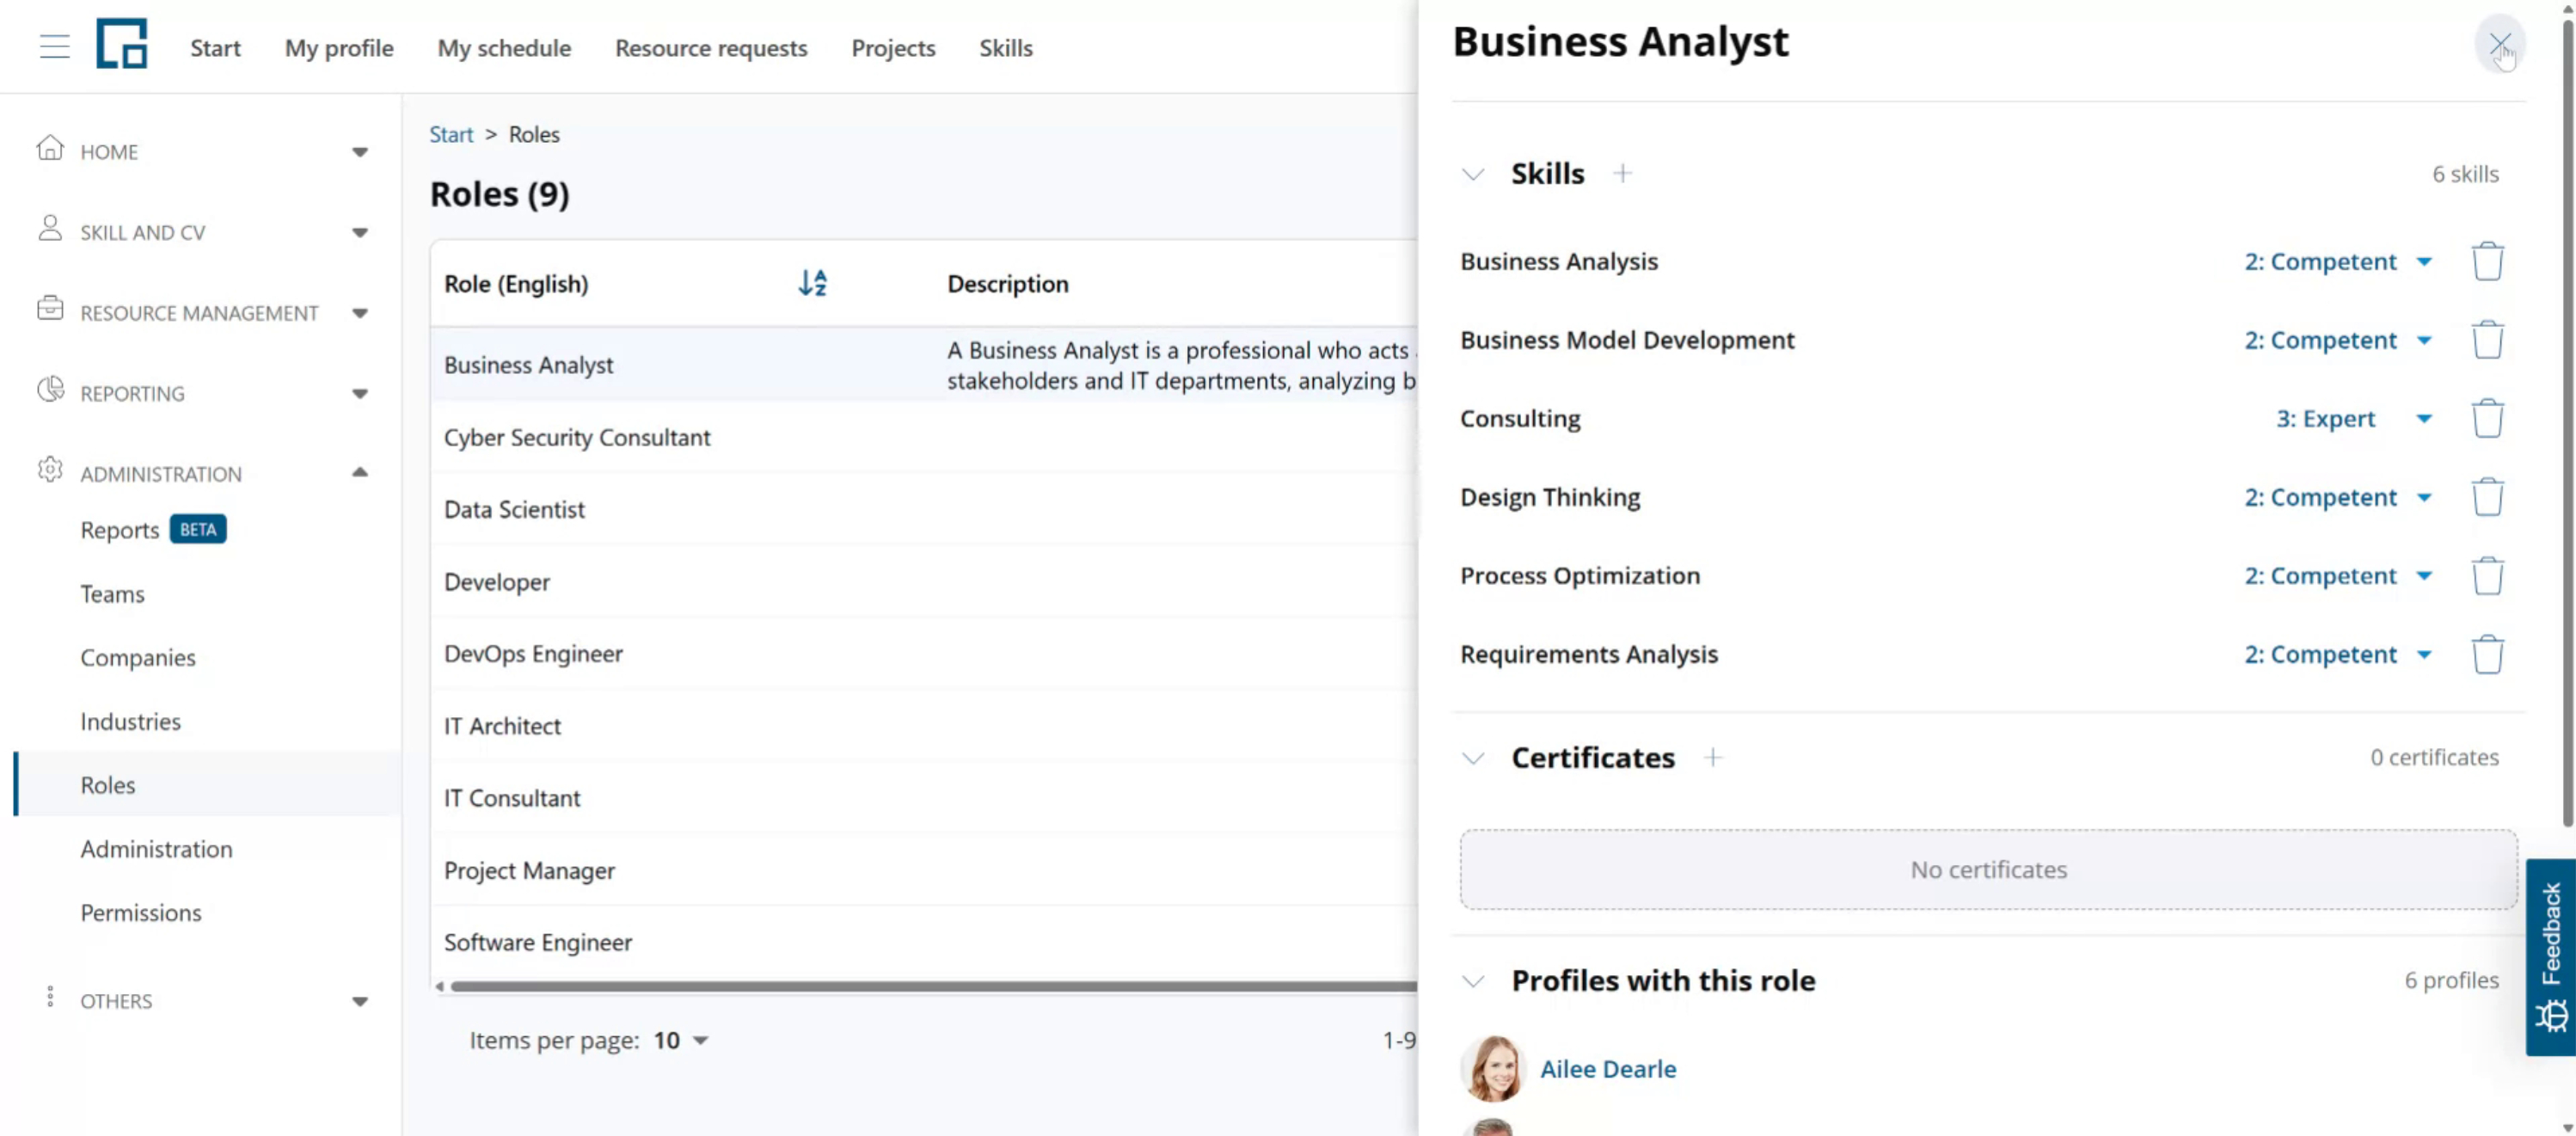
Click anywhere outside the side drawer or on the X in its' top right corner to close it.
Exporting the role list
Click Export above the table to download the role catalogue as an Excel file. Instead of only the counts you see in the table, the file spells out what is behind them, on separate tabs:
| Tab | Contents |
|---|---|
| Roles | One row per role, with the same columns as the table, including the role name in every configured language. |
| Requirements | One row per role and required skill or certificate. Type says which of the two it is, and Target level repeats the ‘Required level at least’ from the role’s side drawer. A skill with no level set shows ‘Any level’; certificates have no level, so the cell stays empty. A role with nothing linked to it yet appears once with these cells empty. |
| Holders | Only included for users who also have Manage skills, certificates and roles. One row per role and the person holding it, with their name, email, user ID and team. Roles nobody holds are left out, and people whose account has been deactivated are not listed, so this tab can show fewer people than the Profiles count on the Roles tab. |
Every tab repeats the role name in each configured language in its last columns, so you can filter or pivot on the translation you work in.
Note: The Export button requires the data export permission and View skills, certificates and roles, the same permission that lets you open this page. The Holders tab is included only for users who additionally have Manage skills, certificates and roles, because it pairs each person with their email and team, which the role’s holder list inside the app does not show. Everyone else receives a file with the Roles and Requirements tabs only.
Where the Holders tab is included, people you are not permitted to view appear under a pseudonym such as ‘Anonymous 7F3A’, with their email, user ID and team left empty, the same masking the profiles list in the side drawer applies. The same person always carries the same pseudonym, so you can still tell how many distinct people hold a role.
Adding roles
To create a new role, click the Add button above the table and enter the role name, for example Web Developer. Hit Add or Enter. After creation, the role is shown at the top of the table for direct access. (After reloading the page it will be sorted in alphabetically.)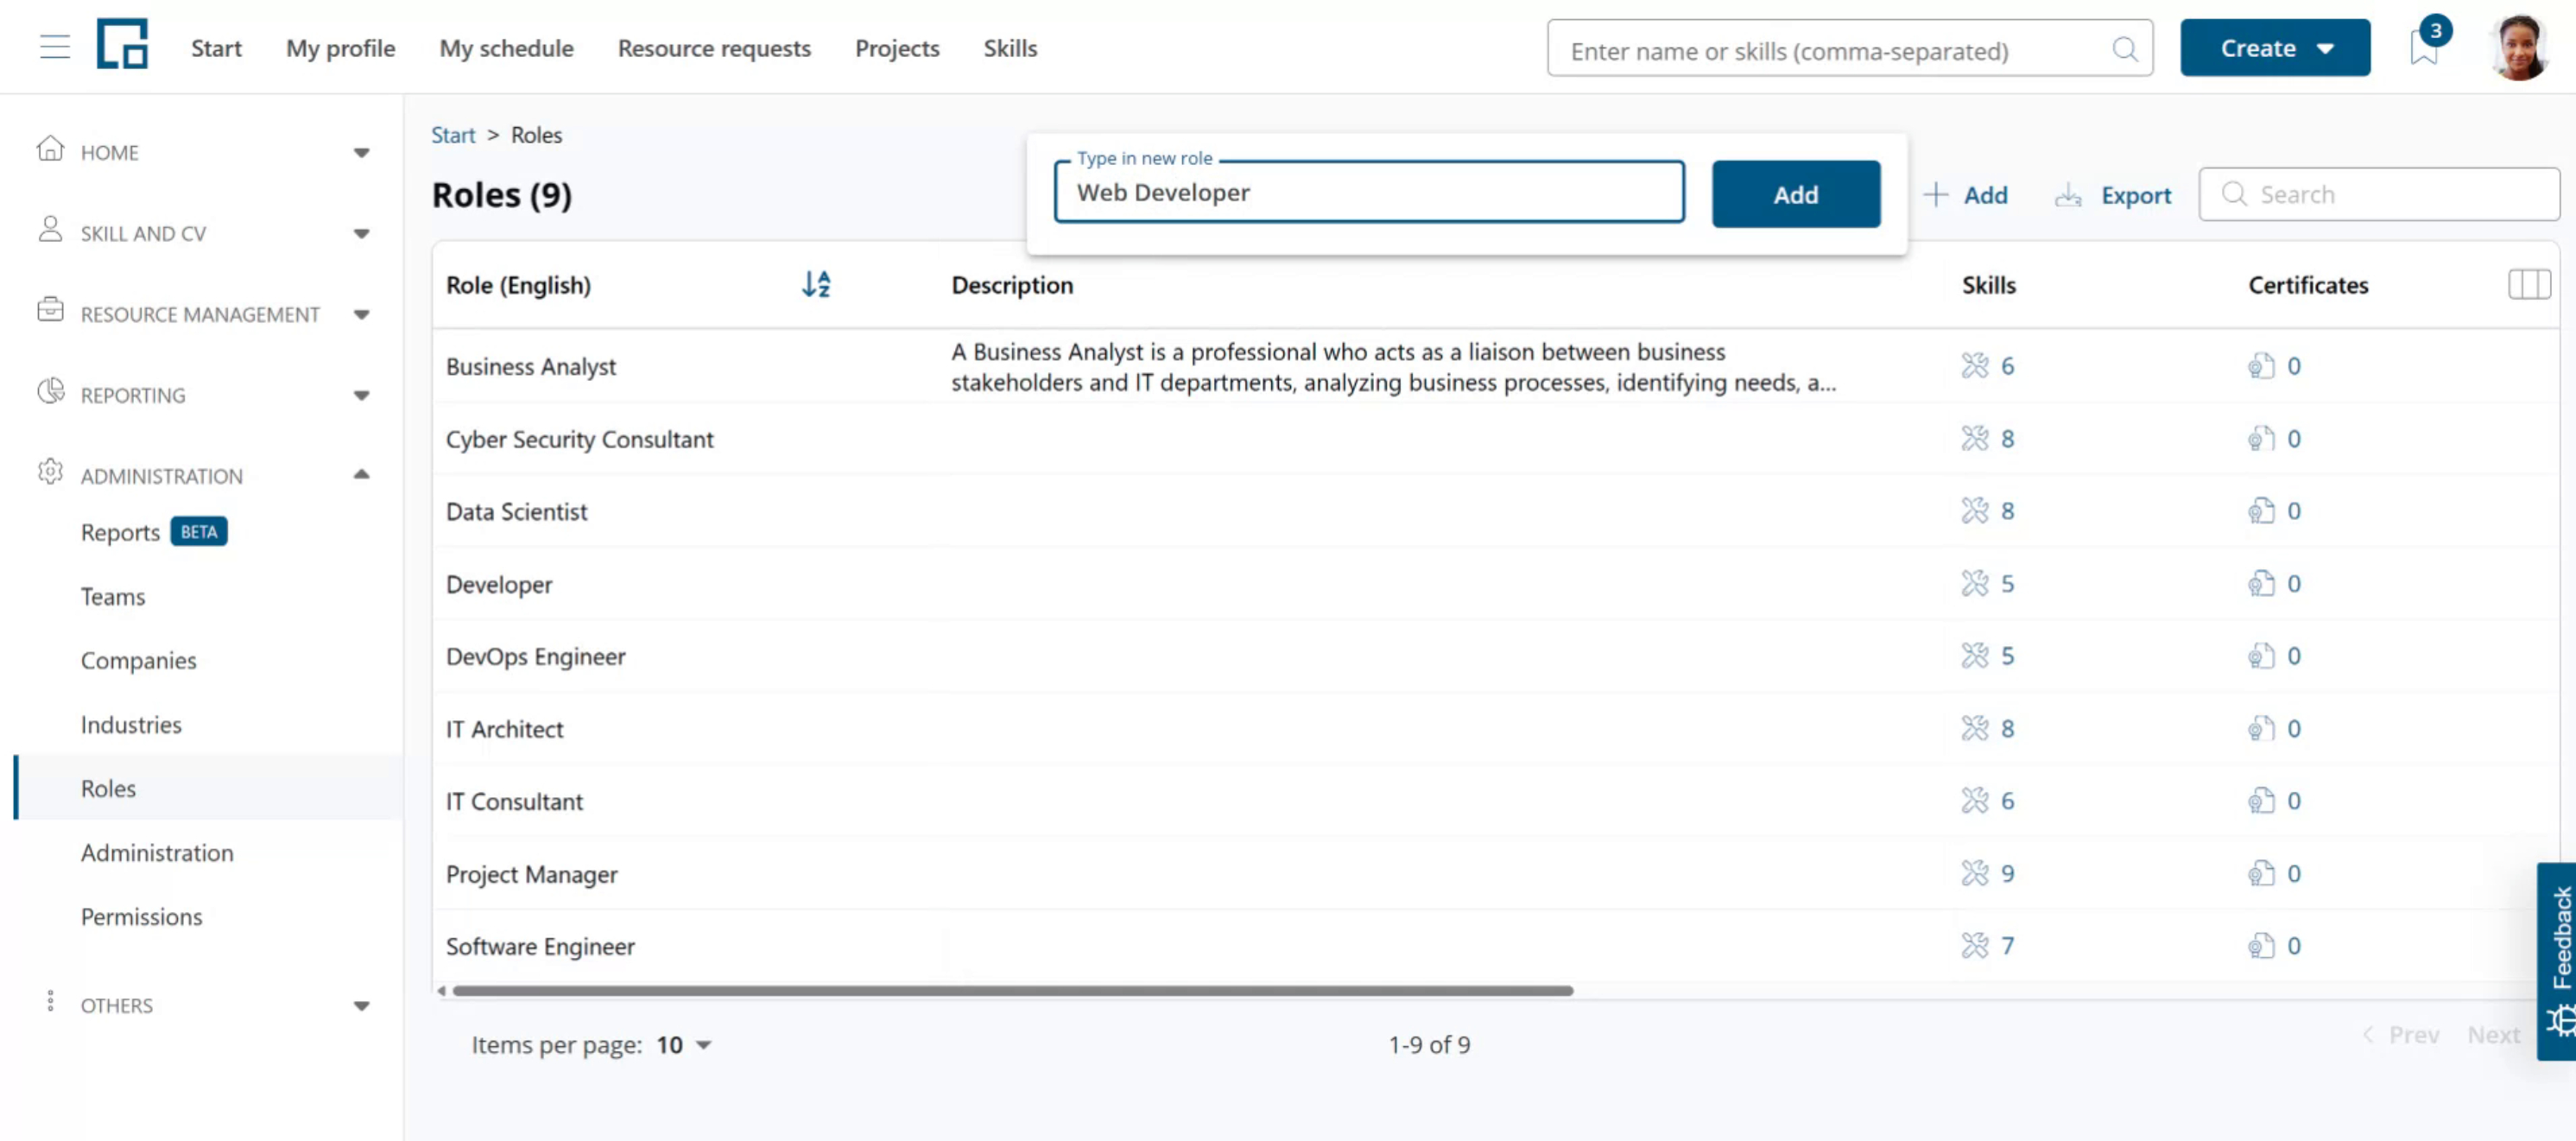 decídalo will automatically create a description and translate the role name into all configured screen languages. Review the description and translations and edit them if needed. Scroll to the right to see the translations.
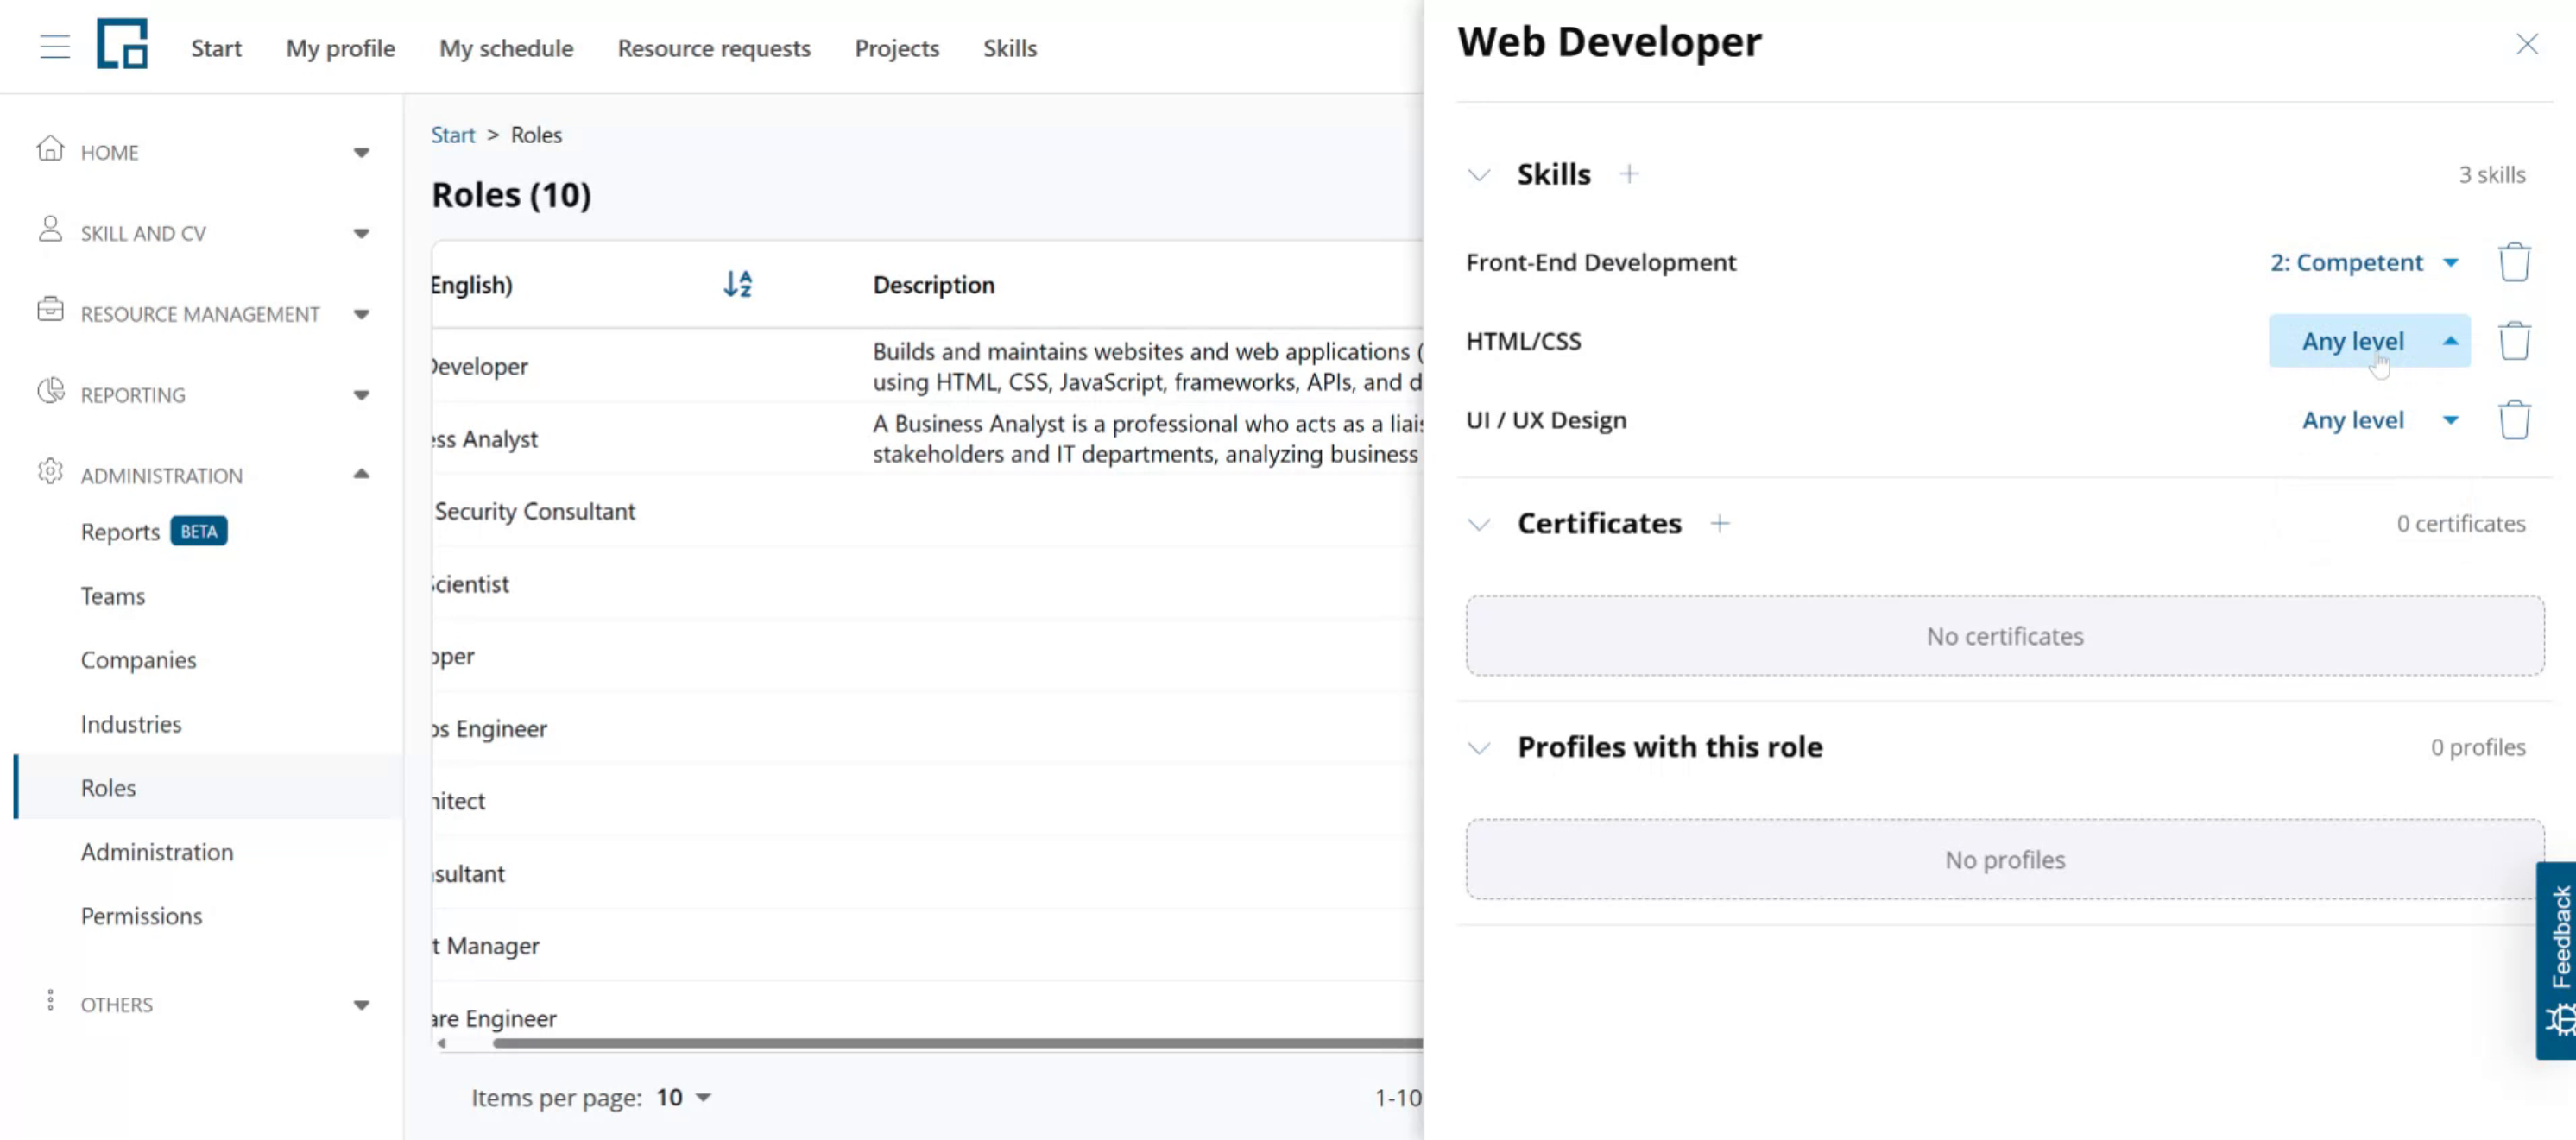
Click the link in the Skills column to open the side panel and add skills or certificates. Click the Plus icon in the skills section and use the auto-complete search box to select required skills. For our Web Developer this could be Front-end Development, HTML/CSS, UI / UX Design, among others. 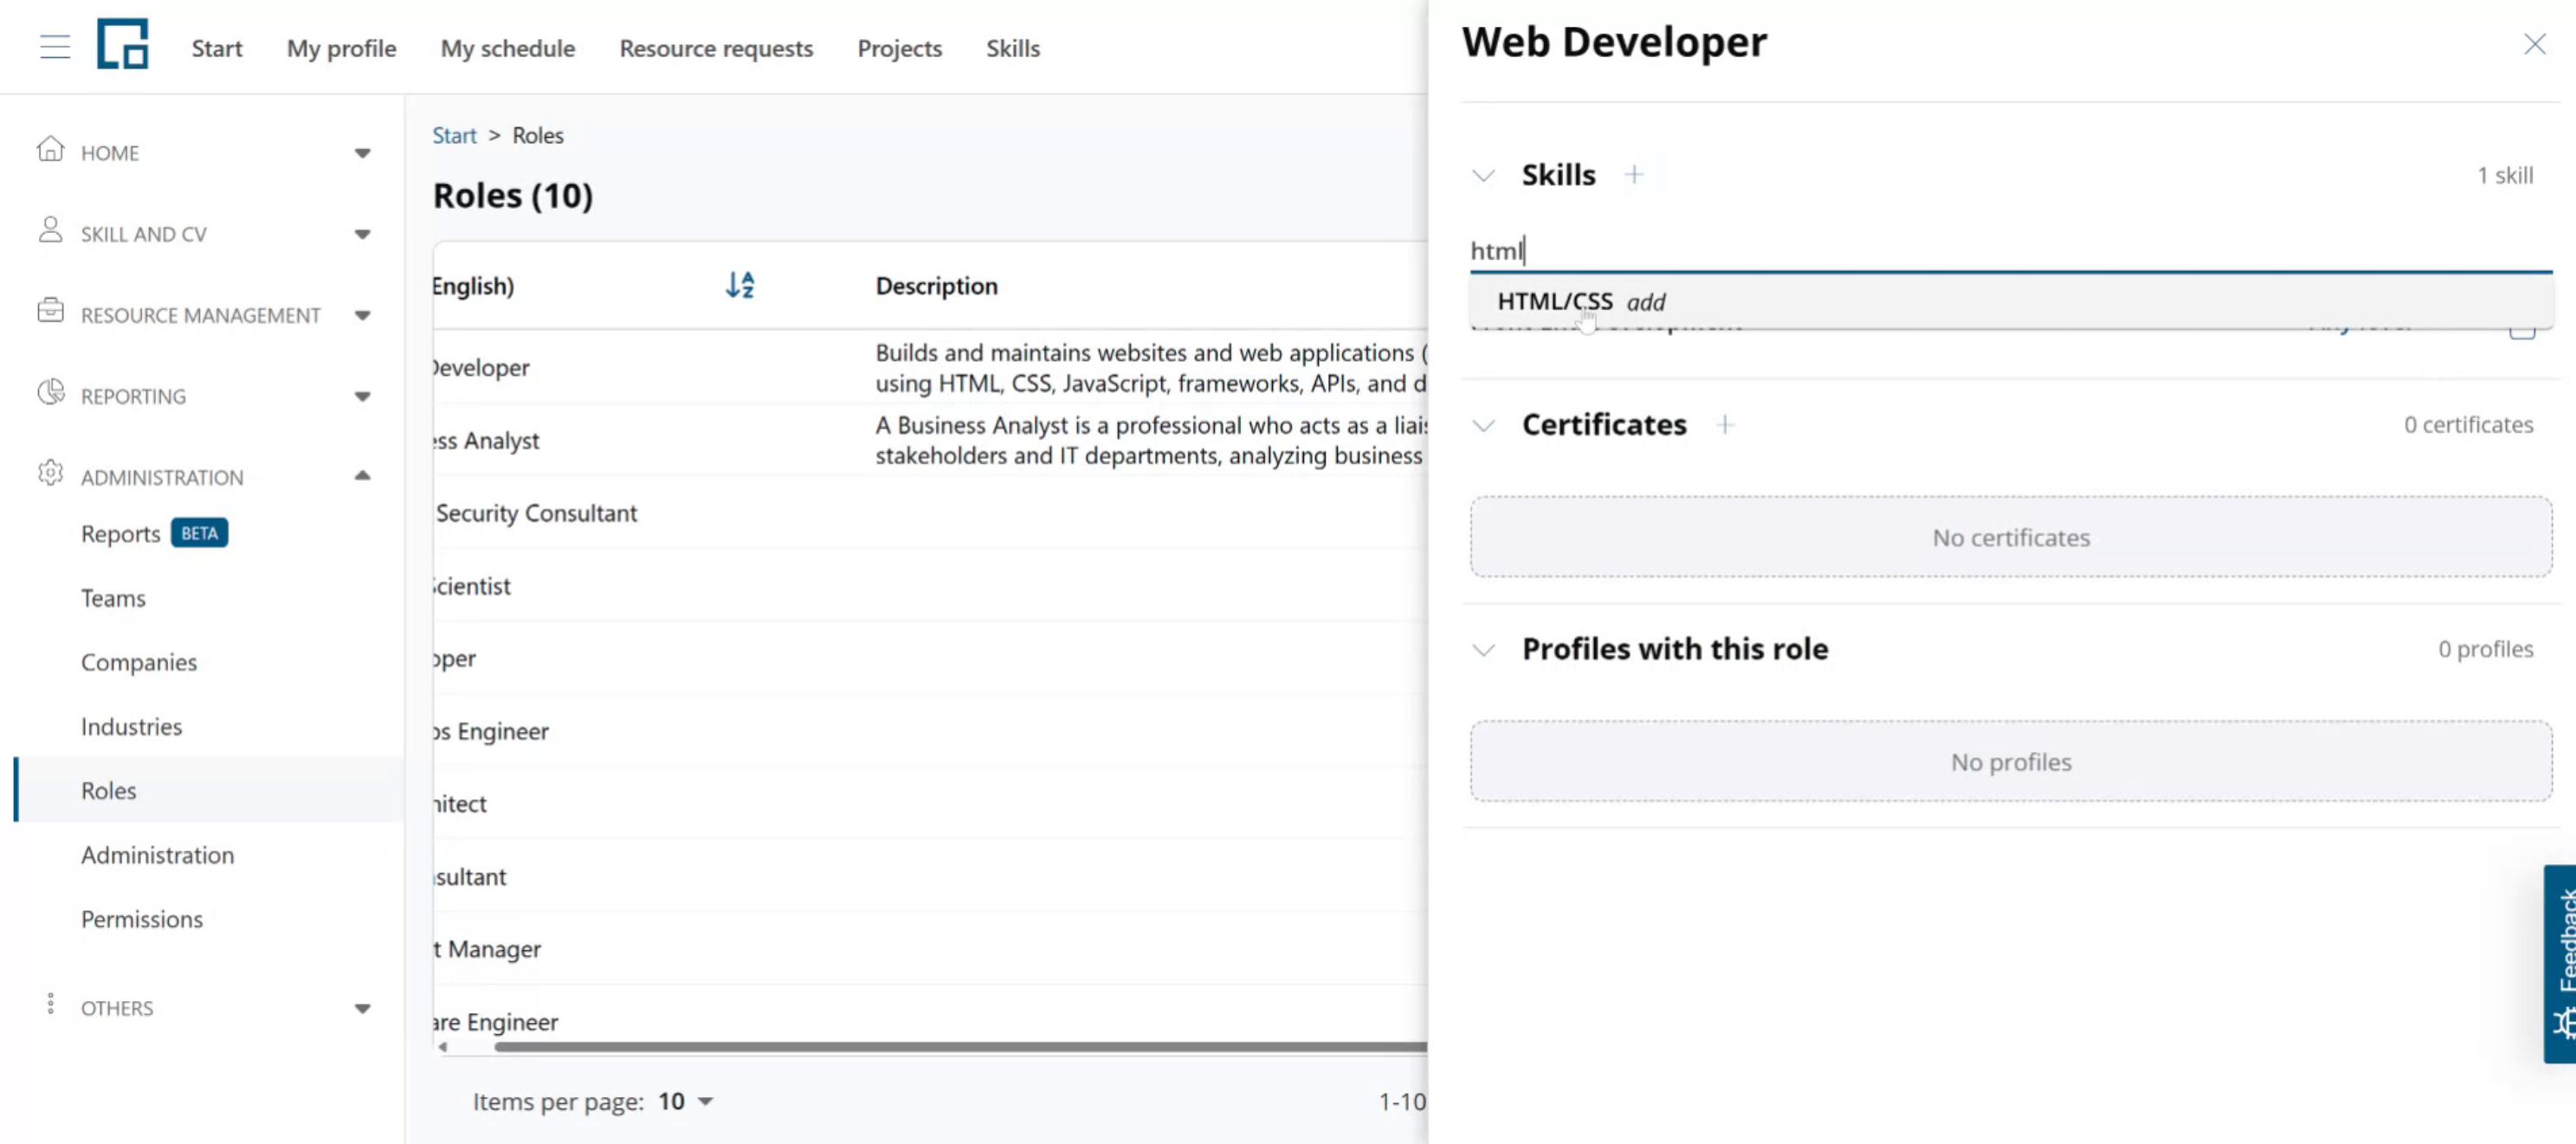
Note that skills are selected from the skills catalog and the list can be different for every decídalo client. Skill requirements a company has for specific roles also
Set the required level for each skill. This will be used for gap-analysis and compared to the skill levels of employees.
Adding certificates works the same way. Click the Plus in the certificates section. Certificates don't have levels.
The new role is directly available for selection on Profiles.