Customizing Data Fields in decídalo
This document provides instructions on how to customize data fields within decídalo. As an administrator, you can modify, hide and add data fields of objects and change their position on the user interface.
Editing data fields
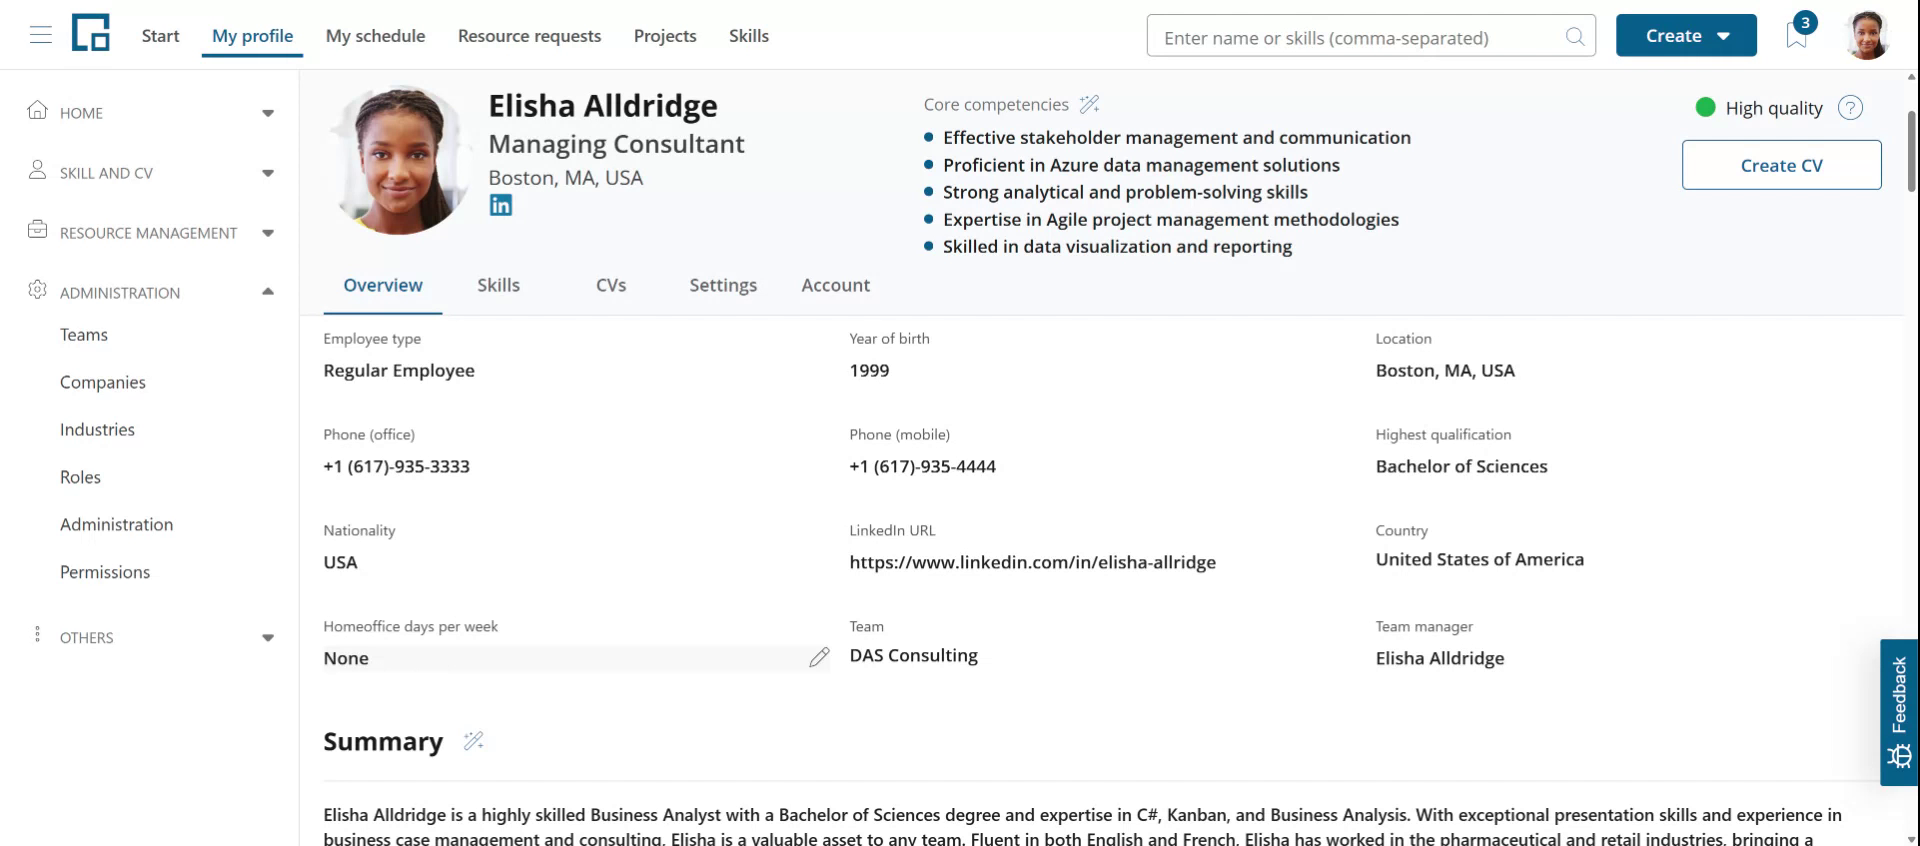
As an administrator, you can customize the data fields of objects in decídalo. Select the Administration menu item under Administration in the main menu.
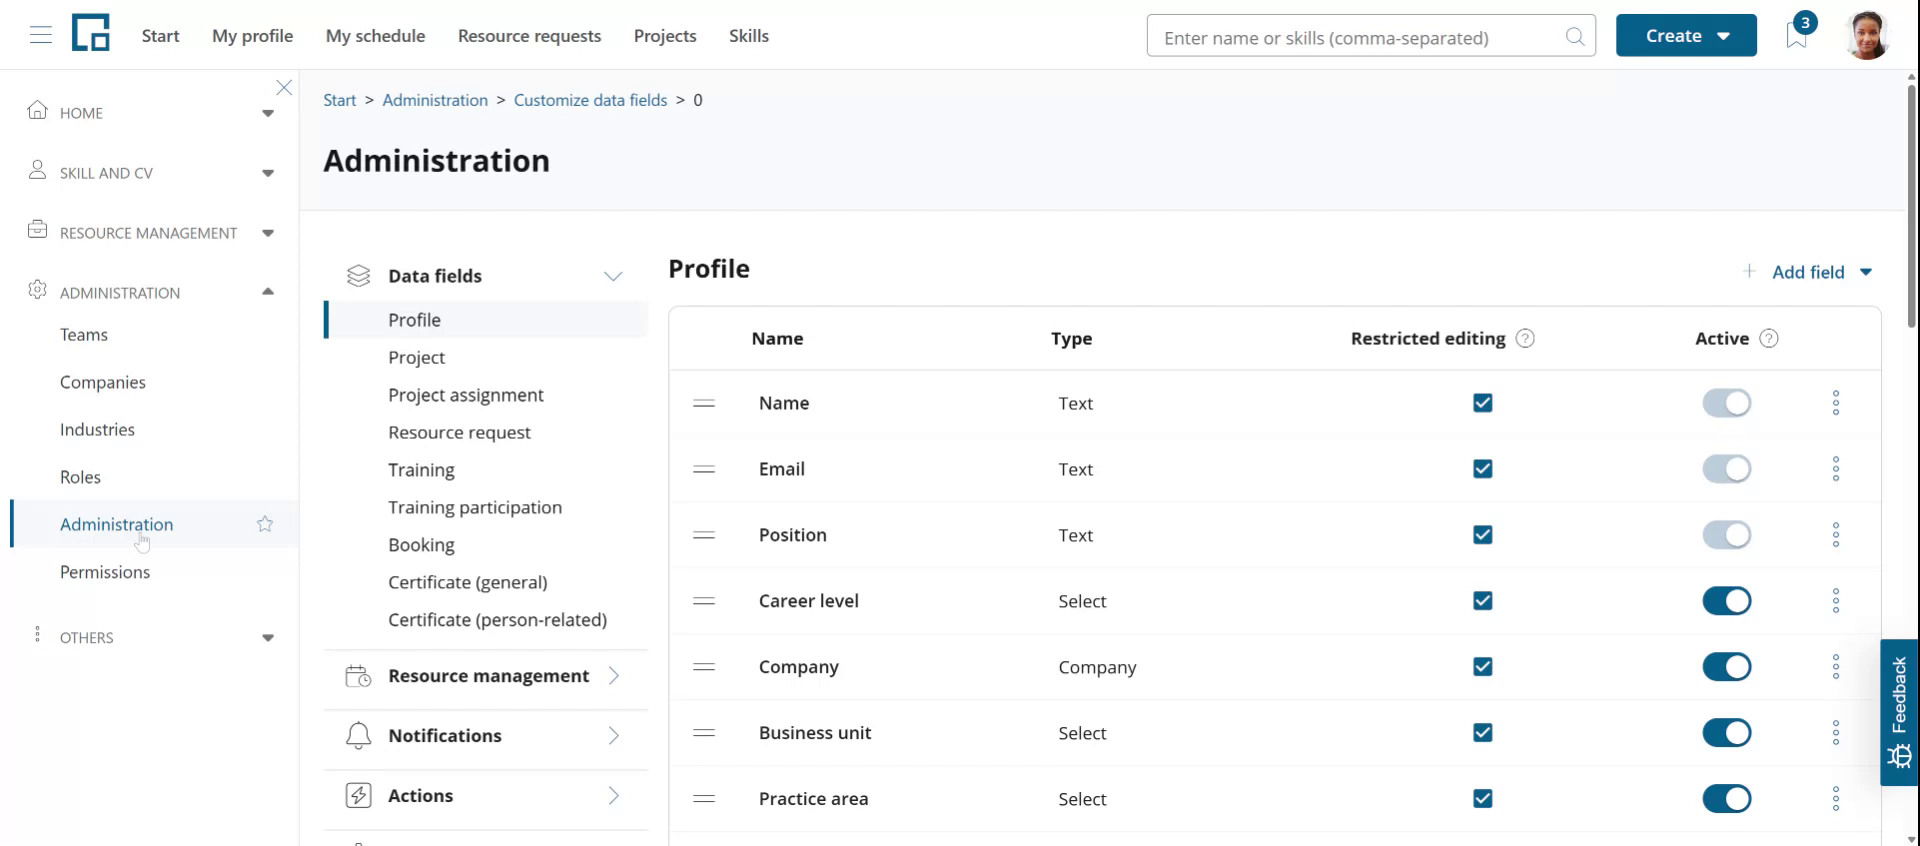
On the Administration page, you will find the Data Fields area, listing the objects you can modify.
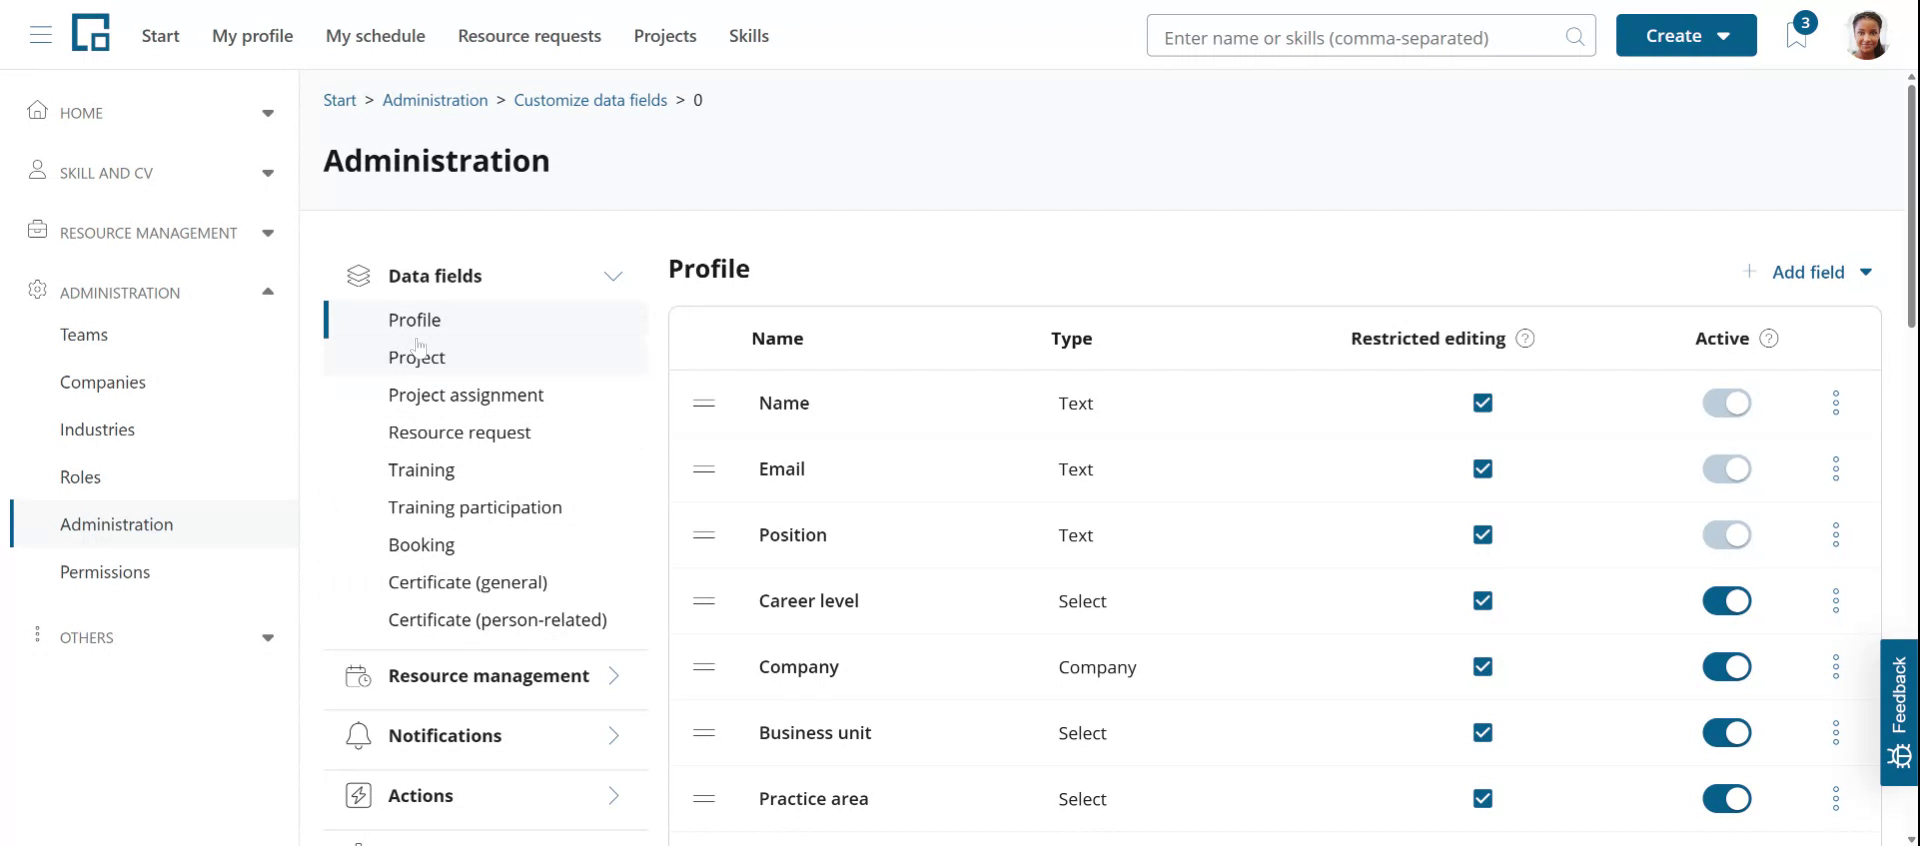
Select an object to view all data fields associated with it. We will use Profile as an example here. You will see the datatype in the Type column, whether the field is in use or not in the Active column, and edibility in the Restricted editing column.
The Restricted editing option is used for scenarios where the objects are imported from an external system. Core user data for example is typically imported from an HR system. In this case you want to prevent users from editing the imported data. Check the Restricted editing checkbox to do so. Note that Administrators can still edit restricted fields to fix data if needed. For all other users restricted fields are locked and will be showing a lock icon to indicate this.
The toggle switch in the Active column shows if the field is visible on the user interface or not. Standard fields that are essential for the application's functionality cannot be hidden. For these fields the toggle switch is disabled (grayed out). All other fields can be hidden, or shown respectively, by switching the Active toggle.
For the Project object, the field list additionally shows a Show in creation dialog column. Check it to show the field in the project creation dialog; uncheck it to remove the field from the dialog again. Inactive fields cannot be shown in the creation dialog; activate the field first. The column is only offered for field types the creation dialog can display and only for fields that can be set at creation, so system-managed fields such as the project status are excluded. Fields in the creation dialog can also be prefilled with values from the creating user's profile (see Field Presets).
All fields can be edited using the configuration option available via the three-dots context menu on the right of each data field row.
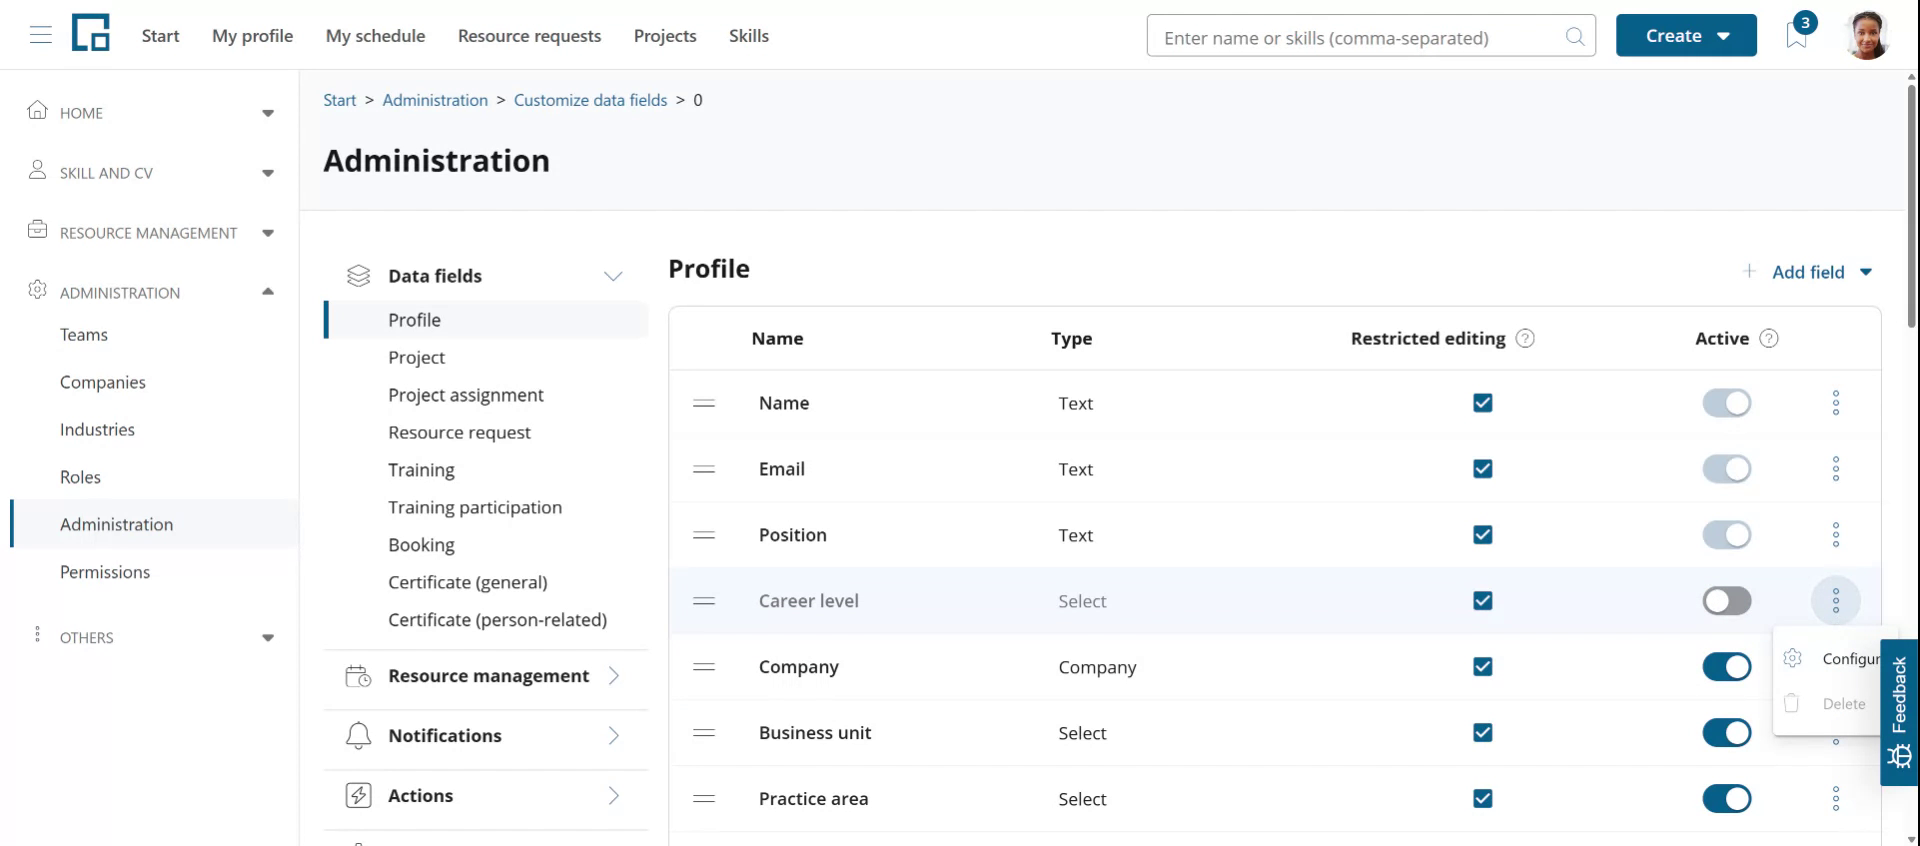 Clicking on Configuration opens a pop-up for editing the field name and, if the field is of type Select, the selectable options.
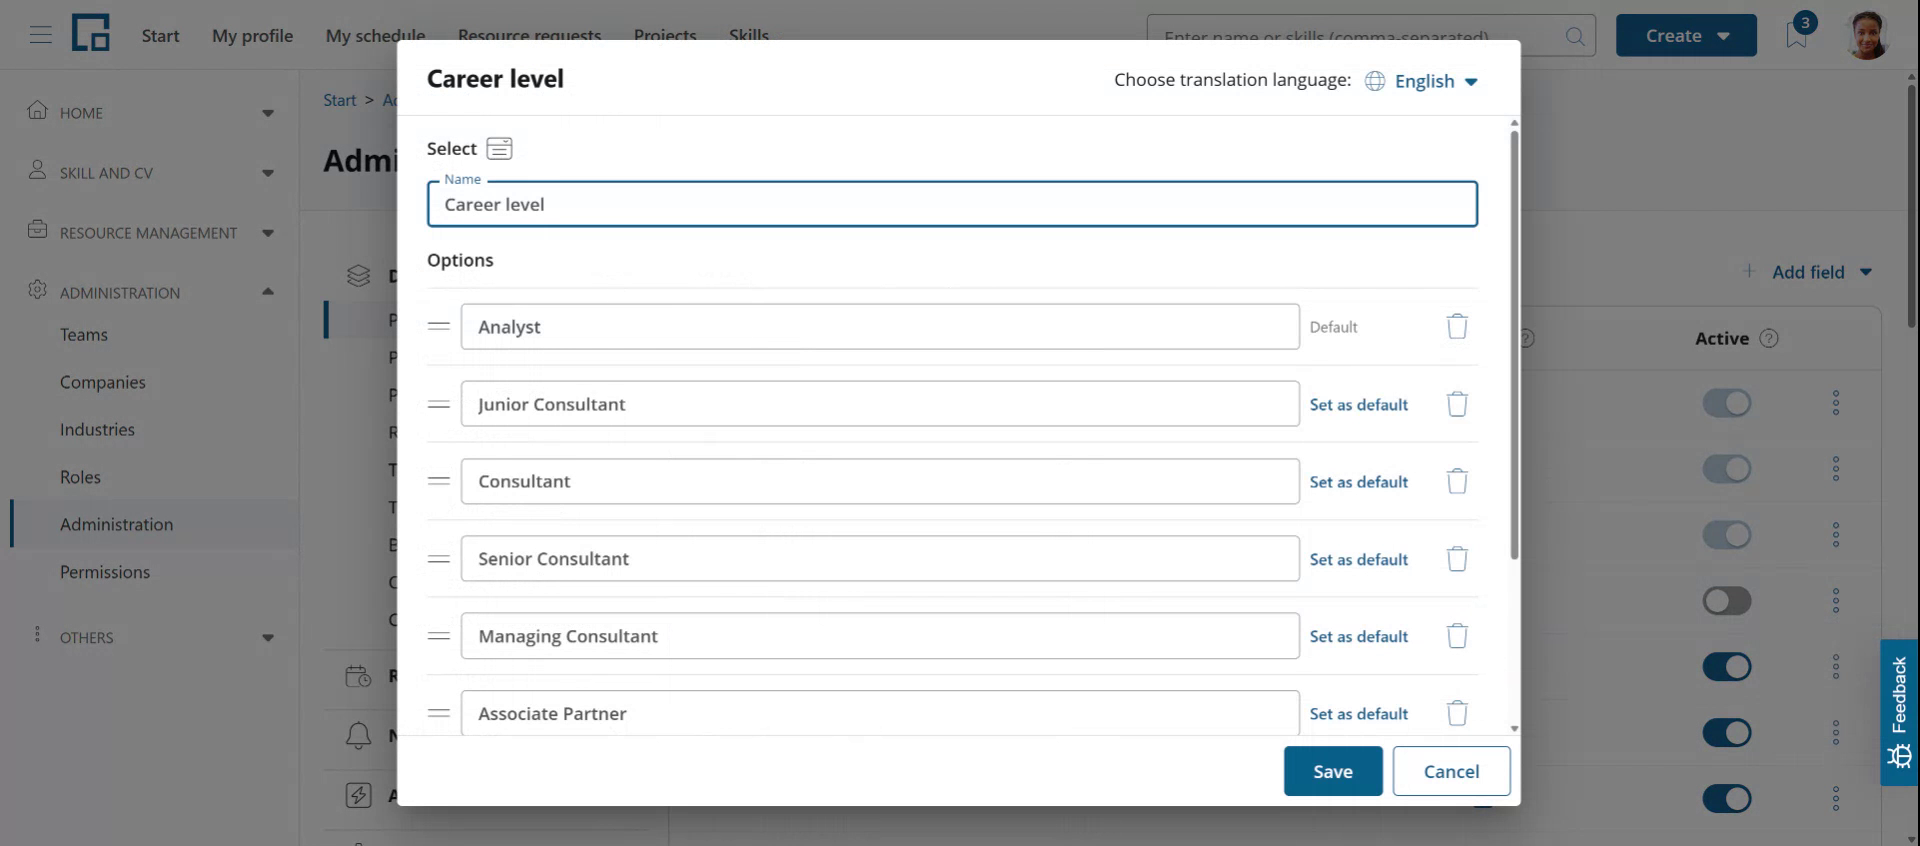 Each select field has a default option indicated by the Default label right of the input field. You can change the default option by clicking "Select as default" on another option.
Each option has an Active toggle. Switch it off to retire an option you no longer want people to choose. A retired option disappears from the field's selection list everywhere in the application, but nothing is lost: entries that already use it keep their value, still display it, and can still be saved with it. Switch the toggle back on to offer the option again.
To remove an option entirely, click the recycle bin right of it. Deleting is not the same as retiring: the option is removed from every entry that uses it, and that data cannot be recovered. Retire the option instead whenever the existing entries should keep their value.
At least one option has to stay active, so the Active toggle of the last active option is disabled, and that option cannot be deleted either. Retire or delete the other options first if you want to replace it.
An option that is set as default can be retired as well. New entries are still created with it, because that is what a default is for, but once the value has been changed it can no longer be chosen again. If that is not what you want, set another option as the default first.
Use the drag handles in front of each option to rearrange them by dragging and dropping them to another position in the list.
To add more options use the Add options link button below the list. Scroll down if it is not visible.
Field names and options can be translated into all configured languages, both the screen languages and any additional CV template languages. Field names will be automatically translated when a new field is added. Options are not auto-translated since often fixed terms are used that don't require translations. Here the same value is used for each language by default.
To check or edit translations, change the language from the language-dropdown in the top-right corner of the pop-up. 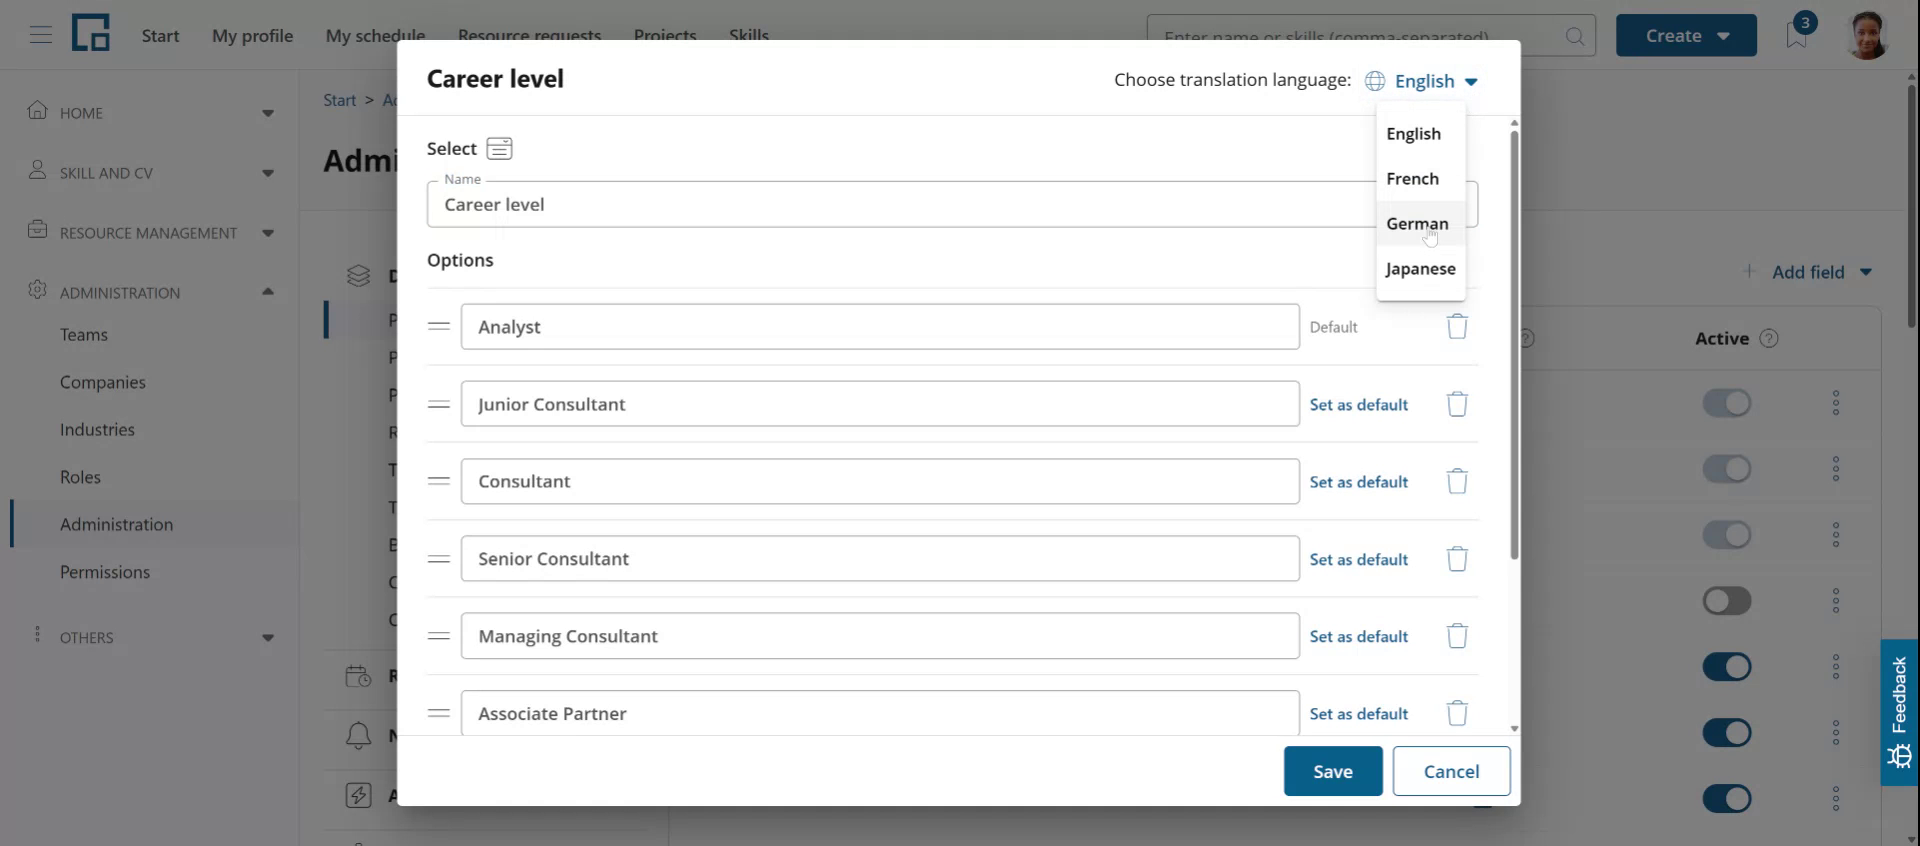 Save your changes with the Save button.
For select type fields, all options must have a value in every language. Otherwise, the Save button is disabled. If Save is disabled, check if there are empty options in any language. If so, provide a value or remove the option to enable saving.
Adding data fields
To create new data fields, click on Add field above the field list and select the field type. This opens a pop-up for entering the field name and options.
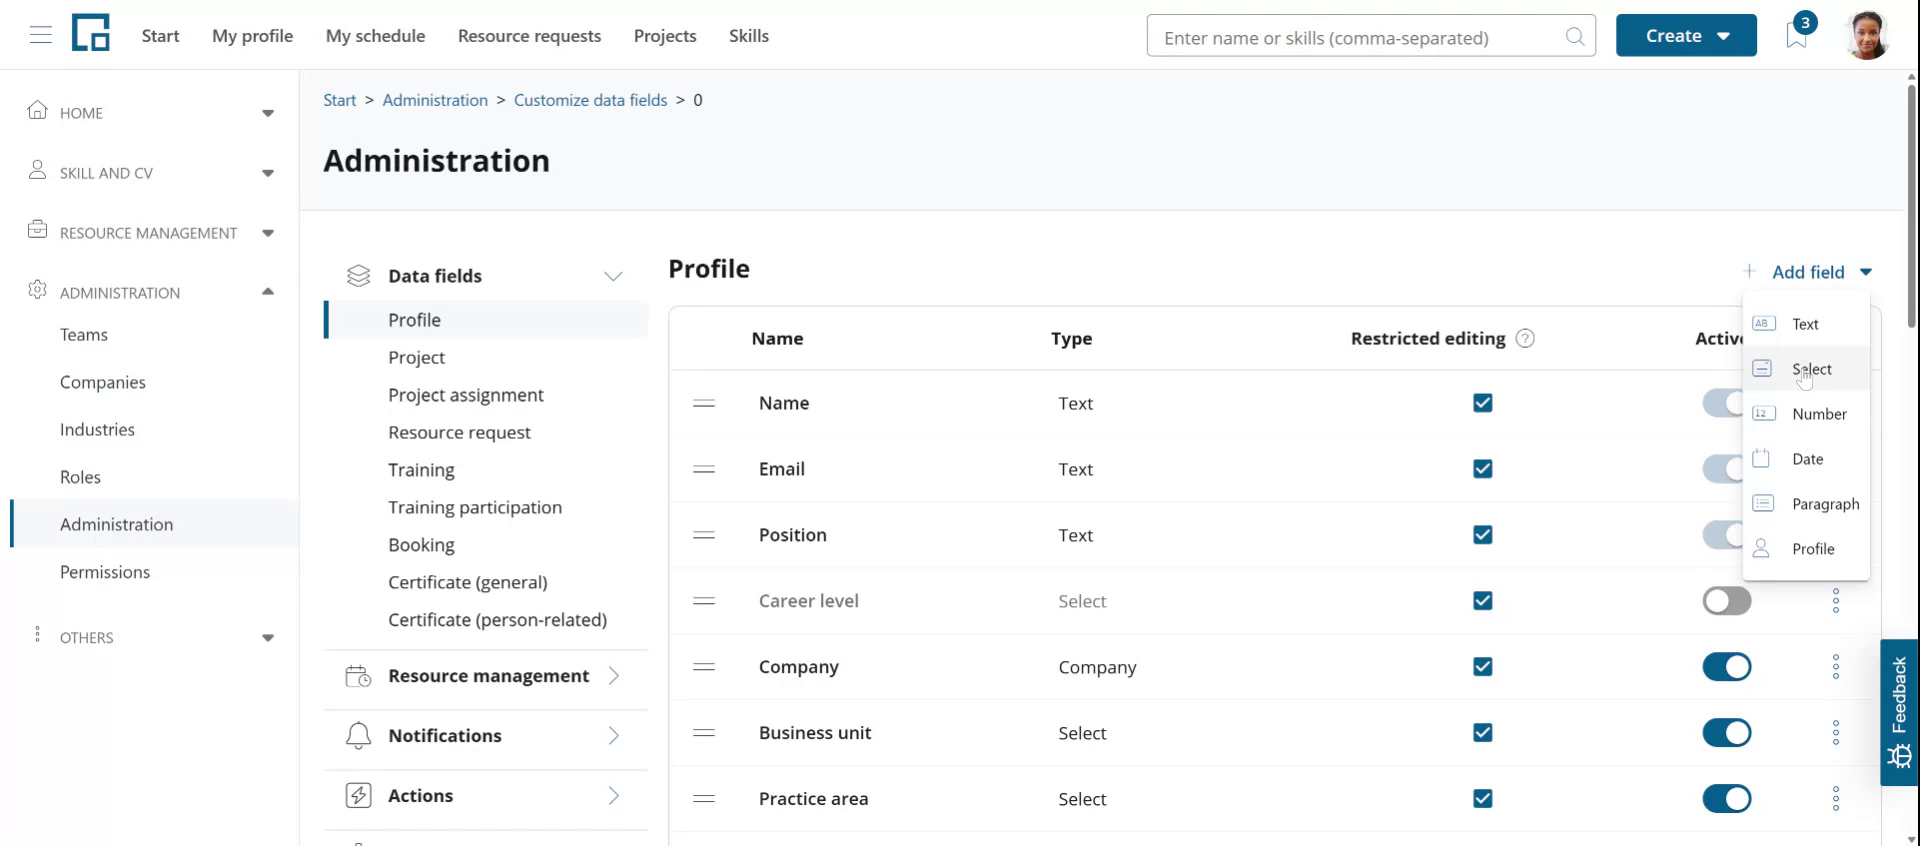 In this example we will add a select field for the number of home office days a person has.
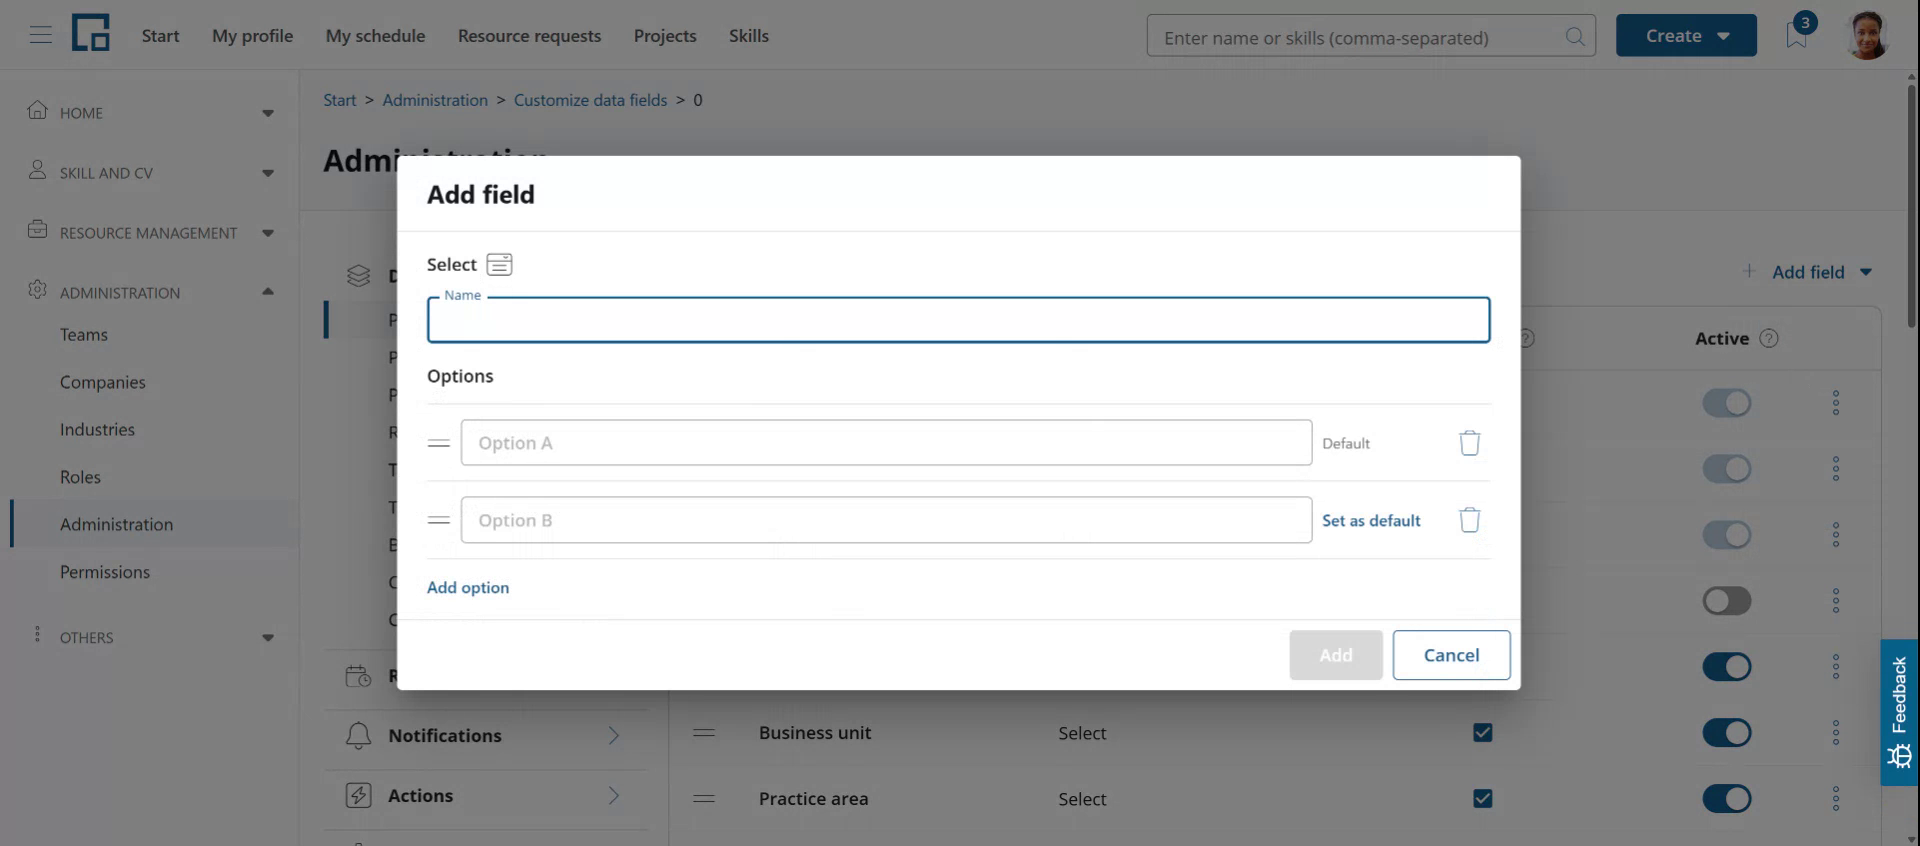 Enter the field name and, in the case of a select-type field, the options.
For all other types than Select you can only provide the field name.
If you need more than two options, use the Add options link-button below the options list to add a row to the options list.
Make sure all option rows are filled out to enable the Add button on the form. Click Add to create the new field.
The options of a new field are always active, so the Active toggle is not offered here. It appears once the field exists and you open it via Configuration.
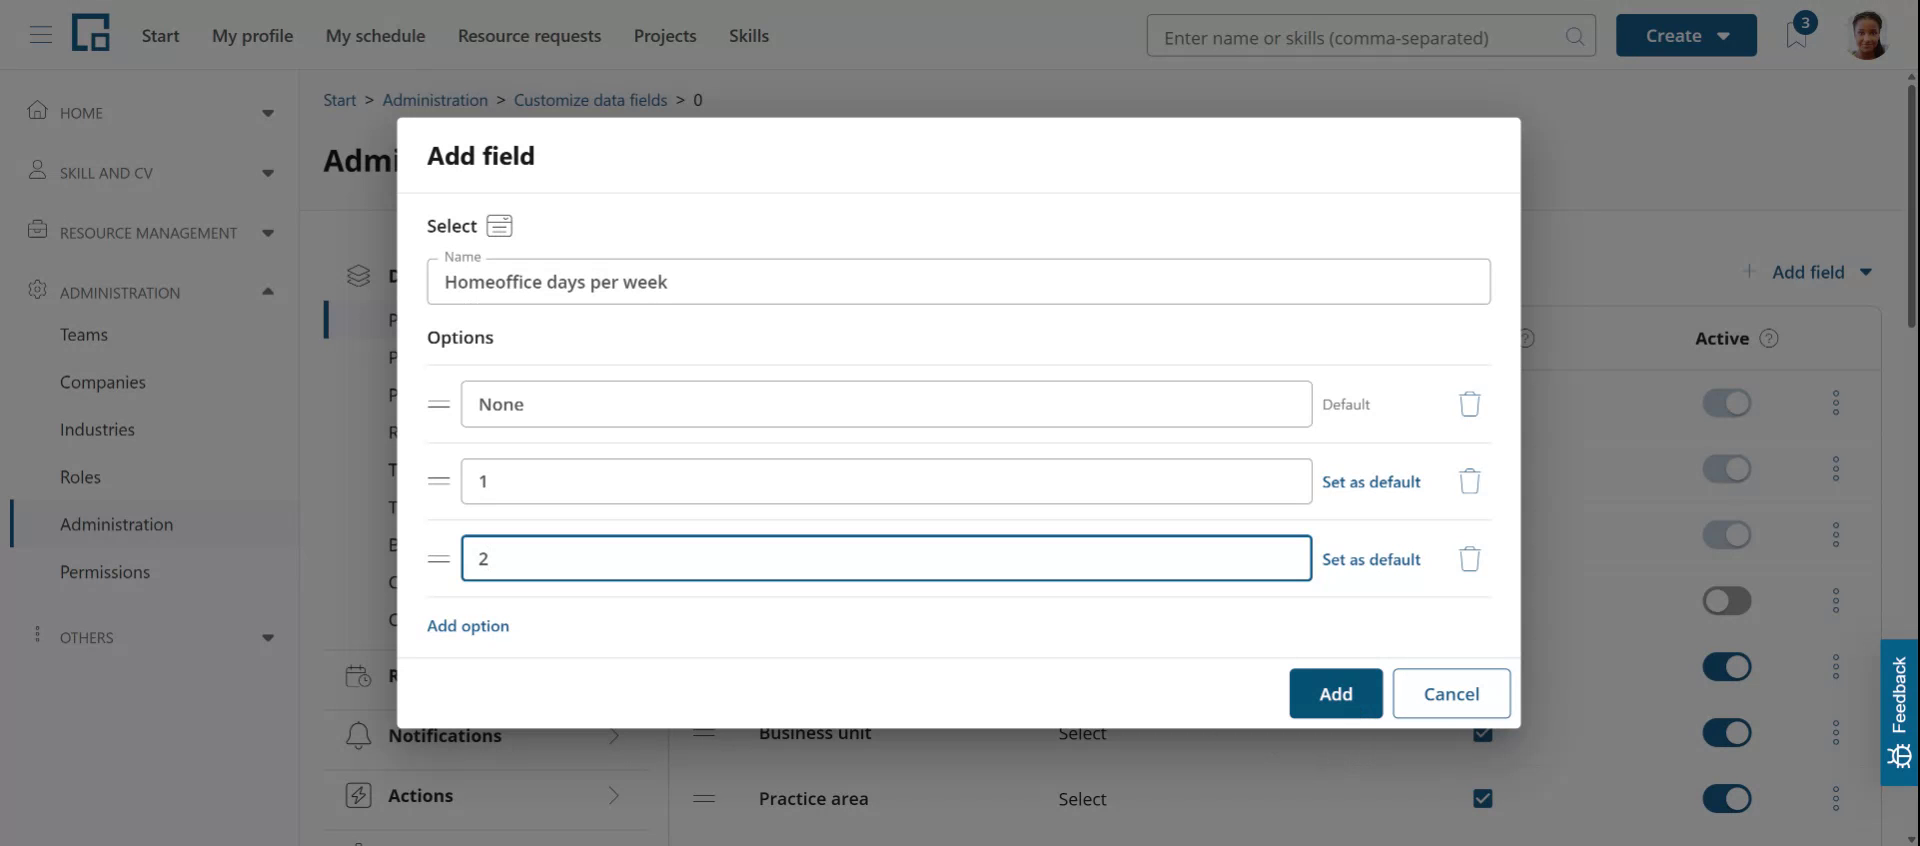 The field name will be automatically translated, and the new field will appear at the bottom of the fields list (scroll down to see it if needed).
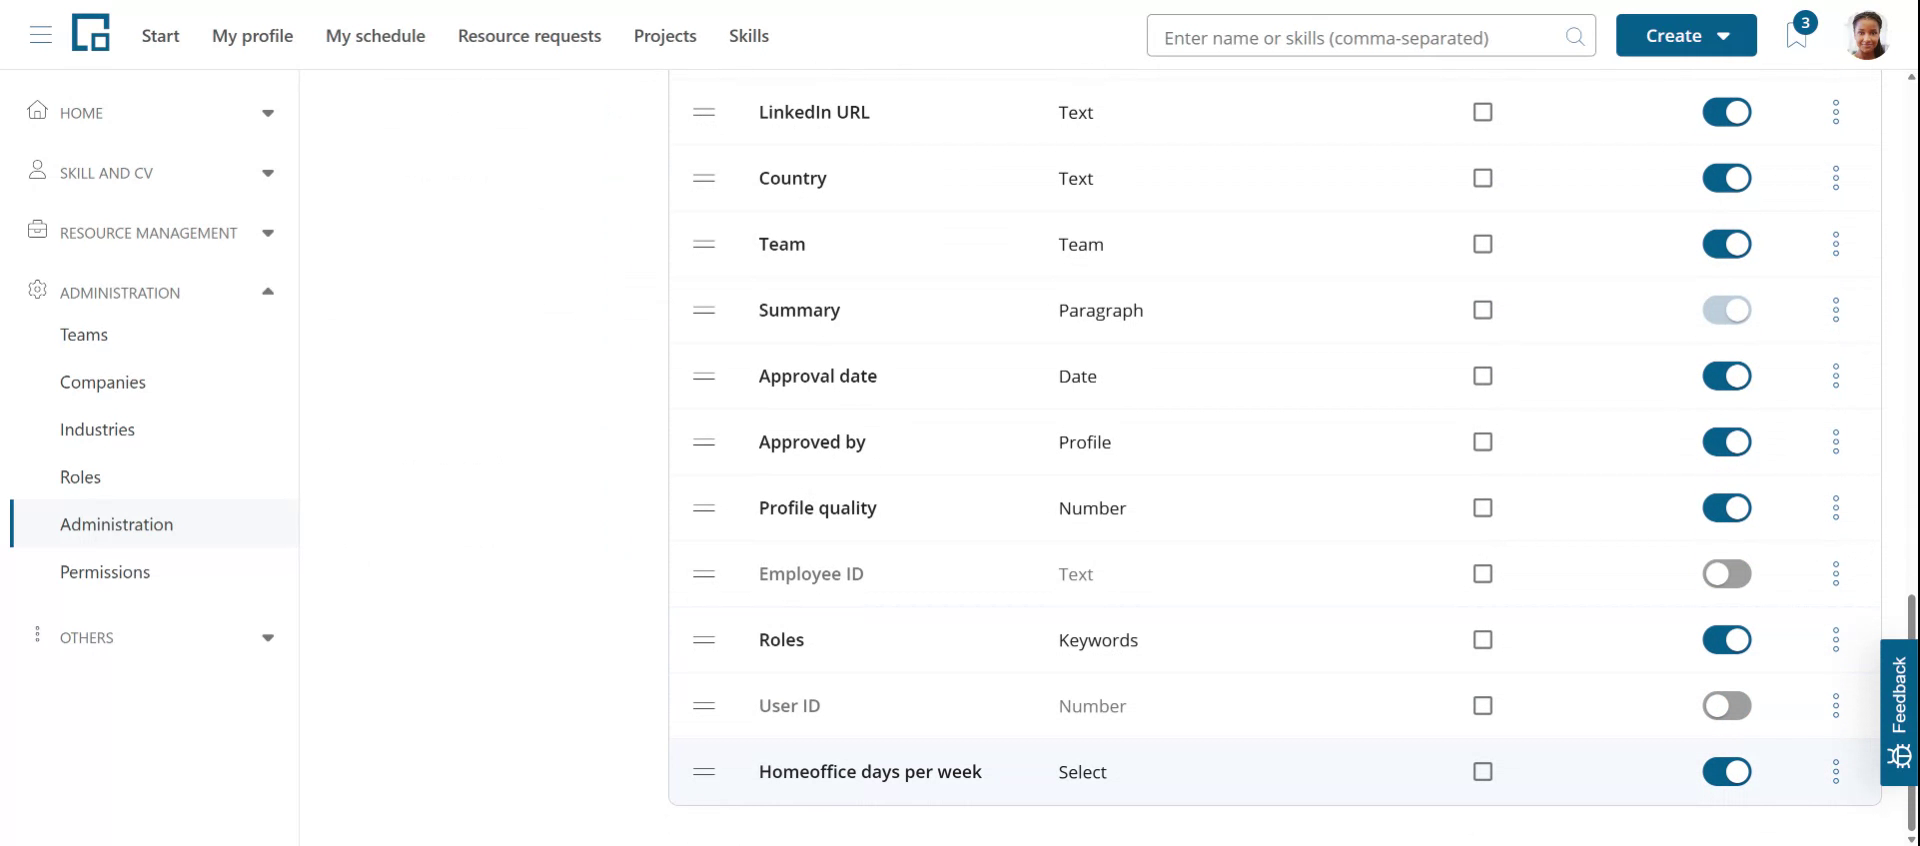 You can reposition the field by using the drag handle in front of it and dragging and dropping it to your desired position on the user interface. The order of the fields on the user interface (in this example the Profile page) is the same as in the field list on the Administration page. Team section on your profile.
Since field names are automatically translated, you should check the translations if you use decídalo with multiple screen languages. To do this follow the steps described above in the "Editing data fields" paragraph. Not that when you click the three dots of the new field, the Delete option is enabled.
Note that standard fields that come with the application cannot be deleted, which is why the Delete option is disabled for them in the three-dots context menu. Custom fields added by an Administrator can be deleted using the Delete option.
There is one exception: on objects whose records carry recorded time or billing data (currently Order) no field can be deleted at all, not even a custom one. The Delete option stays disabled and explains why on hover: "Fields of this entity cannot be deleted, because its records carry recorded time or billing data." Such a field can still be hidden with the Active toggle.
To check that the field was added correctly navigate to a corresponding object. In this example we use the My profile page to check the new profile field. The field is added behind (or before) the field where you positioned it on the Administration page. The default option is set.
The field can now be used like any other data field. It is also available as a column on the corresponding object table, in this example the Profiles page. If it is not directly visible in the table, use the column selector to add it to the table.